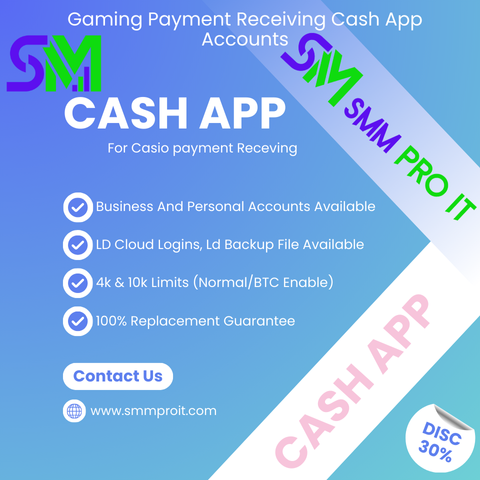
Upgrade to Pro

  • Role Of DNA Profiling in The Biological Identification of A Person

    DNA Forensics Laboratory Pvt. Ltd. provides precise, confidential, and legally valid DNA profiling services with a rapid turnaround, expert interpretation, and reliable support for both legal and personal matters, utilizing advanced technology and experienced professionals.

    With advancements in genetics, identifying a person through DNA has become as precise as fingerprint analysis. DNA profiling examines specific genetic markers to create a unique identity profile. It plays a vital role in medical research, diagnostics, and understanding human biology, while also supporting legal and forensic identification.

    Book your DNA profiling test now: Call +91 8010177771 or WhatsApp +91 9266615552.

    Visit us:https://www.dnaforensics.in/tests/dna/peace-of-mind/dna-profiling-test/

    #DNAProfiling #BiologicalIdentity #Genetics #DNAForensics
    Role Of DNA Profiling in The Biological Identification of A Person DNA Forensics Laboratory Pvt. Ltd. provides precise, confidential, and legally valid DNA profiling services with a rapid turnaround, expert interpretation, and reliable support for both legal and personal matters, utilizing advanced technology and experienced professionals. With advancements in genetics, identifying a person through DNA has become as precise as fingerprint analysis. DNA profiling examines specific genetic markers to create a unique identity profile. It plays a vital role in medical research, diagnostics, and understanding human biology, while also supporting legal and forensic identification. Book your DNA profiling test now: Call +91 8010177771 or WhatsApp +91 9266615552. Visit us:https://www.dnaforensics.in/tests/dna/peace-of-mind/dna-profiling-test/ #DNAProfiling #BiologicalIdentity #Genetics #DNAForensics
    WWW.DNAFORENSICS.IN
    DNA Profiling Test in India | Accurate & Confidential DNA Testing
    At DNA Forensics Laboratory, we provide accurate and confidential DNA profiling services in India for legal, personal, and verification needs.
    ·12 Views ·0 Vista previa
  • Buy Verified Cash App Account
    Email: contact.smmproit@gmail.com
    Telegram: @smmproit
    Whatsapp:+1(812)528-8960
    https://smmproit.com/product/buy-verified-cash-app-accounts/

    In today’s fast-moving digital world, managing financial transactions quickly and safely is everything. Whether you run a gaming platform, work as a game host, or handle online payments, having verified cash app accounts can make your life much easier.

    But why is everyone talking about buying a verified cash app account? Let’s break it down in simple words.

    Why should you buy Verified Cash App accounts for your gaming business?

    Running a gaming business is not just about fun—it’s about handling money, payments, and smooth user experience.

    Understanding gaming business payments

    Imagine your users want instant payouts after winning a game. Would they wait for hours? Probably not. That’s where cash app accounts come in.

    Role of cash app accounts in gaming

    With a verified account, you can:

    Process payments instantly
    Handle live streaming broadcast music events with paid access
    Manage transactions smoothly

    It’s like upgrading from a bicycle to a sports car—everything becomes faster.

    The positive side of Buy Verified Cash App Accounts
    Faster financial transactions

    Speed matters. A verified cash app account allows quick transfers without delays.

    Higher transaction limits

    Unverified accounts? Limited.
    Verified ones? Higher transaction limits and more freedom.

    That means more unlimited uploads share infinite opportunities for your business.

    How to unlock Cash App Borrow?
    Step-by-step unlocking process
    Use your account regularly
    Maintain good transaction history
    Link your bank account
    Stay active over time
    Requirements and eligibility
    Verified identity
    Active usage
    Good payment behavior

    Think of it like building trust—step by step.

    Benefits of Owning Buy Verified Cash App Accounts for gaming business
    Easy money handling

    You can send and receive money without stress.

    Secure bank account linking

    Linking your bank account ensures:

    Safe payments
    Reliable withdrawals

    It’s like having a digital wallet that never sleeps.

    How to Buy Verified Cash App Accounts from smmproit
    Step-by-step buying guide
    Visit the platform
    Choose your verified cash app accounts
    Complete payment
    Receive account upload details
    Login with free login access

    Simple, right?

    Why Do People Trust smmproit
    Reliable services and support

    People trust smmproit because:

    24 hours reply contact support
    Fast delivery
    Quality services

    They also offer:

    creator tools
    tips & subscriptions stats use listener insights

    It’s not just selling accounts—it’s full support.

    When Buy Verified Cash App Accounts?
    Best time to purchase
    When starting a gaming business
    When scaling operations
    When needing faster transactions

    Timing is everything.

    Buy verified cash app accounts
    Buy a verified cash app account

    Perfect for beginners who want instant access.

    Buy cash app verified account

    Ideal for professionals handling large financial transactions.

    Buy verified cash app account reddit

    Many users discuss this online due to growing demand.

    Buying verified cash app account

    It saves time and effort compared to manual verification.

    Benefits of a Verified Cash App Account
    Advanced features
    Bitcoin (BTC) access
    offline listening download for content platforms
    live stream payments
    premium services
    How to Buy a Verified Cash App Account
    Key steps
    Choose a trusted seller
    Verify account details
    Secure login access

    Always focus on trust.

    Buy BTC Enabled Cash App Account
    Bitcoin advantages

    A BTC-enabled account allows:

    Crypto trading
    Faster transfers
    More flexibility
    What is the Limit of a Verified Cash App?
    Limits explained

    Verified users enjoy:

    Higher sending limits
    Higher receiving limits

    Unverified accounts? Very restricted.

    How does Cash App work?
    Basic functionality

    Cash App works by linking:

    Your phone number
    Your bank account

    Then you can send, receive, and manage money easily.

    Why Do You Buy Verified Cash App Accounts?
    Business advantages
    Saves time
    Avoids long verification
    Provides instant access
    Is it safe to enable Bitcoin on the Cash application?
    Safety tips

    Yes, if you:

    Use secure login
    Avoid sharing details
    Enable security features
    How to Bypass Cash App Verification
    Important considerations

    Honestly, bypassing isn’t recommended. Instead:

    Use a verified account
    Follow proper methods

    Safety always comes first.

    Can I Have 2 Verified Cash App Accounts?
    Rules and tips

    Yes, but:

    Use different phone number
    Maintain separate details
    How to Verify Cash App on Android
    Step-by-step process
    Open app
    Enter personal details
    Upload government-issued id
    Wait for approval
    free verified cash app account
    Reality check

    Free accounts sound good—but often:

    Limited features
    Less security

    Paid options are more reliable.

    how to create a verified cash app account
    Creation steps
    Sign up
    Add bank account
    Upload ID
    Confirm details
    Where’s The Best Place To Buy A Verified Cash App Account?
    smmproit and Reviews Fund business explanation

    When it comes to reliability, smmproit stands out as a trusted provider. They offer high-quality verified cash app accounts with strong support and smooth delivery.

    Another name worth mentioning is Reviews Fund business, known for its credibility in online services. However, smmproit goes a step further by offering:

    Better customer support
    Faster delivery
    Extra tools like creator tools creator tools

    If you want a safe and smooth experience, smmproit is a solid choice.

    Conclusion

    Buying a verified cash app account can completely change how you manage your online business. From faster financial transactions to better features like BTC and live streaming, the benefits are clear.

    If you’re serious about growing your gaming or online business, investing in a verified account is a smart move. Just remember—always choose trusted providers and focus on security.

    FAQs
    1. Is buying a verified cash app account legal?

    It depends on local laws and platform policies. Always check before buying.

    2. Can I use a verified account for business?

    Yes, it’s perfect for handling business transactions.

    3. How fast can I get a verified account?

    Usually within minutes to hours after purchase.

    4. Do verified accounts have more features?

    Yes, including BTC access, higher limits, and premium tools.

    5. Is smmproit safe to use?

    Yes, many users trust it due to reliable services and support.
    Email: contact.smmproit@gmail.com
    Telegram: @smmproit
    Whatsapp:+1(812)528-8960
    https://smmproit.com/product/buy-verified-cash-app-accounts/
    Buy Verified Cash App Account Email: contact.smmproit@gmail.com Telegram: @smmproit Whatsapp:+1(812)528-8960 https://smmproit.com/product/buy-verified-cash-app-accounts/ In today’s fast-moving digital world, managing financial transactions quickly and safely is everything. Whether you run a gaming platform, work as a game host, or handle online payments, having verified cash app accounts can make your life much easier. But why is everyone talking about buying a verified cash app account? Let’s break it down in simple words. Why should you buy Verified Cash App accounts for your gaming business? Running a gaming business is not just about fun—it’s about handling money, payments, and smooth user experience. Understanding gaming business payments Imagine your users want instant payouts after winning a game. Would they wait for hours? Probably not. That’s where cash app accounts come in. Role of cash app accounts in gaming With a verified account, you can: Process payments instantly Handle live streaming broadcast music events with paid access Manage transactions smoothly It’s like upgrading from a bicycle to a sports car—everything becomes faster. The positive side of Buy Verified Cash App Accounts Faster financial transactions Speed matters. A verified cash app account allows quick transfers without delays. Higher transaction limits Unverified accounts? Limited. Verified ones? Higher transaction limits and more freedom. That means more unlimited uploads share infinite opportunities for your business. How to unlock Cash App Borrow? Step-by-step unlocking process Use your account regularly Maintain good transaction history Link your bank account Stay active over time Requirements and eligibility Verified identity Active usage Good payment behavior Think of it like building trust—step by step. Benefits of Owning Buy Verified Cash App Accounts for gaming business Easy money handling You can send and receive money without stress. Secure bank account linking Linking your bank account ensures: Safe payments Reliable withdrawals It’s like having a digital wallet that never sleeps. How to Buy Verified Cash App Accounts from smmproit Step-by-step buying guide Visit the platform Choose your verified cash app accounts Complete payment Receive account upload details Login with free login access Simple, right? Why Do People Trust smmproit Reliable services and support People trust smmproit because: 24 hours reply contact support Fast delivery Quality services They also offer: creator tools tips & subscriptions stats use listener insights It’s not just selling accounts—it’s full support. When Buy Verified Cash App Accounts? Best time to purchase When starting a gaming business When scaling operations When needing faster transactions Timing is everything. Buy verified cash app accounts Buy a verified cash app account Perfect for beginners who want instant access. Buy cash app verified account Ideal for professionals handling large financial transactions. Buy verified cash app account reddit Many users discuss this online due to growing demand. Buying verified cash app account It saves time and effort compared to manual verification. Benefits of a Verified Cash App Account Advanced features Bitcoin (BTC) access offline listening download for content platforms live stream payments premium services How to Buy a Verified Cash App Account Key steps Choose a trusted seller Verify account details Secure login access Always focus on trust. Buy BTC Enabled Cash App Account Bitcoin advantages A BTC-enabled account allows: Crypto trading Faster transfers More flexibility What is the Limit of a Verified Cash App? Limits explained Verified users enjoy: Higher sending limits Higher receiving limits Unverified accounts? Very restricted. How does Cash App work? Basic functionality Cash App works by linking: Your phone number Your bank account Then you can send, receive, and manage money easily. Why Do You Buy Verified Cash App Accounts? Business advantages Saves time Avoids long verification Provides instant access Is it safe to enable Bitcoin on the Cash application? Safety tips Yes, if you: Use secure login Avoid sharing details Enable security features How to Bypass Cash App Verification Important considerations Honestly, bypassing isn’t recommended. Instead: Use a verified account Follow proper methods Safety always comes first. Can I Have 2 Verified Cash App Accounts? Rules and tips Yes, but: Use different phone number Maintain separate details How to Verify Cash App on Android Step-by-step process Open app Enter personal details Upload government-issued id Wait for approval free verified cash app account Reality check Free accounts sound good—but often: Limited features Less security Paid options are more reliable. how to create a verified cash app account Creation steps Sign up Add bank account Upload ID Confirm details Where’s The Best Place To Buy A Verified Cash App Account? smmproit and Reviews Fund business explanation When it comes to reliability, smmproit stands out as a trusted provider. They offer high-quality verified cash app accounts with strong support and smooth delivery. Another name worth mentioning is Reviews Fund business, known for its credibility in online services. However, smmproit goes a step further by offering: Better customer support Faster delivery Extra tools like creator tools creator tools If you want a safe and smooth experience, smmproit is a solid choice. Conclusion Buying a verified cash app account can completely change how you manage your online business. From faster financial transactions to better features like BTC and live streaming, the benefits are clear. If you’re serious about growing your gaming or online business, investing in a verified account is a smart move. Just remember—always choose trusted providers and focus on security. FAQs 1. Is buying a verified cash app account legal? It depends on local laws and platform policies. Always check before buying. 2. Can I use a verified account for business? Yes, it’s perfect for handling business transactions. 3. How fast can I get a verified account? Usually within minutes to hours after purchase. 4. Do verified accounts have more features? Yes, including BTC access, higher limits, and premium tools. 5. Is smmproit safe to use? Yes, many users trust it due to reliable services and support. Email: contact.smmproit@gmail.com Telegram: @smmproit Whatsapp:+1(812)528-8960 https://smmproit.com/product/buy-verified-cash-app-accounts/
    SMMPROIT.COM
    Buy Verified Cash App Accounts
    Buy Verified Cash App Accounts for your online gaming payment receiving in 2025. You will get all old Personal and Old type Business accounts from us.
    ·113 Views ·0 Vista previa
  • D2R Items Tips for a Smooth Start

    Few action RPGs have had as much long-lasting influence as D2R Items. When Diablo II: Resurrected launched, it brought the legendary 2000 classic back with modern graphics, smoother animations, and updated quality-of-life features while preserving the original mechanics that made the game so beloved. For many players, the remaster is both nostalgic and brutally challenging. Unlike many modern ARPGs, Diablo II rewards preparation, careful planning, and patience rather than quick experimentation.

    If you’re planning to jump into the dark world of Sanctuary for the first time—or returning after many years—there are several key things you should understand before beginning your adventure. Learning these systems early will save you from frustration and help you progress smoothly through the game’s increasingly difficult challenges.

    Choose Your Class Carefully
    At the beginning of the game, you’ll choose one of several playable classes. Each class has its own abilities, skill trees, and combat style. Your options include the Amazon, Sorceress, Necromancer, Paladin, Barbarian, Druid, and Assassin.

    Each class plays very differently. The Sorceress specializes in powerful elemental magic, making her excellent for dealing large amounts of damage from a distance. The Barbarian is a melee powerhouse who relies on physical strength and durability. Meanwhile, the Necromancer can summon skeletons and other minions to fight on his behalf.

    What makes class choice particularly important is the skill system. Each level grants skill points that must be placed into abilities across three different skill trees. Although the game offers limited ways to reset your skill points, respec opportunities are not unlimited. This means poorly planned builds can make later difficulties significantly harder.

    Because of this, many experienced players recommend researching a build before committing too heavily to a skill tree. Having a long-term plan ensures your character will remain effective as enemies grow stronger in later acts and difficulties.

    Attribute Allocation Is More Important Than You Think
    Every time you level up, you also gain attribute points. These points can be assigned to four core stats: Strength, Dexterity, Vitality, and Energy.

    New players often make the mistake of spreading these points evenly across all attributes. While this might seem balanced, it usually results in a weaker character overall. Instead, most builds prioritize Vitality because it increases your health pool and helps you survive tougher fights.

    Strength and Dexterity should typically be increased only when necessary to equip certain weapons or armor. Energy increases mana, but most characters gain enough mana from equipment or potions that heavy investment isn’t required.

    Understanding how attributes affect your character is crucial. A poorly allocated stat distribution can significantly reduce your survivability, especially when facing bosses or elite monsters.

    Resistances Are Essential for Survival
    One of the most important defensive mechanics in the game is elemental resistance. Your character can resist four types of elemental damage: fire, cold, lightning, and poison.

    Early in the game, resistances might not seem particularly important. However, as you progress through the campaign, enemies begin using increasingly powerful elemental attacks. Without proper resistance gear, some monsters can eliminate your character in seconds.

    The situation becomes even more challenging in Nightmare and Hell difficulties. These modes impose resistance penalties that drastically lower your base resistances. To compensate, players must rely on equipment that boosts elemental resistance.

    For this reason, experienced players often prioritize gear that increases resistances rather than focusing purely on offensive stats.

    Death Comes With Real Consequences
    Unlike many modern RPGs, dying in Diablo II has meaningful consequences. When your character dies, your equipment remains on your corpse at the location where you fell. You respawn in town with nothing equipped and must return to your body to retrieve your items.

    This mechanic can lead to tense moments. If you died in a dangerous area filled with enemies, you may need to carefully fight your way back to recover your gear.

    The game also offers a Hardcore mode for players seeking an even greater challenge. In Hardcore mode, death is permanent. If your character dies, the entire character is lost forever.

    This high-risk gameplay adds intensity to every encounter and makes survival strategies extremely important.

    Inventory Management Is a Skill
    The inventory system in Diablo II is intentionally restrictive. Items take up different amounts of space depending on their size, which means your inventory fills quickly.

    To manage this effectively, you should acquire important utility items early in the game. The Tome of Town Portal and Tome of Identify are two of the most useful purchases you can make from early vendors. These tomes hold multiple scrolls while occupying only a small amount of space.

    Town Portal scrolls allow you to instantly open a portal back to town, giving you a quick escape from dangerous situations or a convenient way to sell items and repair equipment.

    Eventually, you will also meet Deckard Cain, a wise scholar who can identify magical items for you without requiring identify scrolls. His presence makes item management far easier.

    Learn to Use the Horadric Cube
    One of the most important items in the entire game is the Horadric Cube. You obtain this artifact during the early stages of Act II, and it quickly becomes an essential tool.

    The cube functions as both a crafting device and additional storage space. Players can combine items inside it to create new ones. For example, three lower-tier gems can be combined into a higher-tier gem.

    Runes can also be upgraded through cube recipes, and certain crafting formulas allow players to create powerful gear with unique properties.

    Mastering Horadric Cube recipes opens the door to advanced item crafting and is a crucial step toward optimizing your character’s equipment.

    Runewords Are Some of the Best Items in the Game
    Runewords are among the most powerful gear options available in the game. They are created by placing specific runes into socketed equipment in a precise order.

    When the correct combination is used, the item transforms into a Runeword and gains powerful bonuses. These bonuses can include massive stat boosts, new abilities, faster casting speed, or even teleportation.

    However, Runewords only work when placed in normal socketed items. If the item is magical, rare, or unique, the runeword will not activate.

    Because of this rule, players must carefully choose the base item before inserting runes. Learning which item bases are ideal for certain runewords is a major part of the game’s deep itemization system.

    Mercenaries Can Carry Your Character
    Mercenaries are AI companions that assist you in combat. You first gain access to one early in the game, and additional types become available in later acts.

    These companions are far more useful than they might initially appear. Mercenaries can equip weapons, armor, and helmets, making them surprisingly strong when properly geared.

    Some mercenaries also provide passive aura bonuses that enhance your character’s abilities. For example, certain mercenaries can boost attack speed, defense, or damage output.

    A well-equipped mercenary can tank enemies, deal additional damage, and help you handle difficult encounters that might otherwise overwhelm your character.

    Grinding Is Part of the Experience
    One of the defining aspects of Diablo II is item farming. Unlike story-focused RPGs, this game is built around repeated runs through specific areas to obtain better gear.

    Players frequently farm certain bosses, elite monsters, or locations known for good loot drops. Over time, these runs gradually improve your character’s equipment and power level.

    While this process can feel repetitive to some players, it is also one of the most satisfying aspects of the game. The excitement of finally finding a rare item after dozens of runs is a major part of Diablo II’s appeal.

    Final Thoughts
    Despite being more than two decades old, the core gameplay of Diablo II remains remarkably deep and engaging. Diablo II: Resurrected preserves everything that made the original game legendary while modernizing its visuals and performance.

    With patience, strategy, and a bit of cheap D2R Items, you’ll soon find yourself fully immersed in the addictive cycle of monster slaying, treasure hunting, and character progression that has kept players returning to Diablo II for decades.

    MMOexp.com boasts years of experience in the D2R Items industry and can guarantee to provide you with the highest quality service.

    D2R Items Tips for a Smooth Start Few action RPGs have had as much long-lasting influence as D2R Items. When Diablo II: Resurrected launched, it brought the legendary 2000 classic back with modern graphics, smoother animations, and updated quality-of-life features while preserving the original mechanics that made the game so beloved. For many players, the remaster is both nostalgic and brutally challenging. Unlike many modern ARPGs, Diablo II rewards preparation, careful planning, and patience rather than quick experimentation. If you’re planning to jump into the dark world of Sanctuary for the first time—or returning after many years—there are several key things you should understand before beginning your adventure. Learning these systems early will save you from frustration and help you progress smoothly through the game’s increasingly difficult challenges. Choose Your Class Carefully At the beginning of the game, you’ll choose one of several playable classes. Each class has its own abilities, skill trees, and combat style. Your options include the Amazon, Sorceress, Necromancer, Paladin, Barbarian, Druid, and Assassin. Each class plays very differently. The Sorceress specializes in powerful elemental magic, making her excellent for dealing large amounts of damage from a distance. The Barbarian is a melee powerhouse who relies on physical strength and durability. Meanwhile, the Necromancer can summon skeletons and other minions to fight on his behalf. What makes class choice particularly important is the skill system. Each level grants skill points that must be placed into abilities across three different skill trees. Although the game offers limited ways to reset your skill points, respec opportunities are not unlimited. This means poorly planned builds can make later difficulties significantly harder. Because of this, many experienced players recommend researching a build before committing too heavily to a skill tree. Having a long-term plan ensures your character will remain effective as enemies grow stronger in later acts and difficulties. Attribute Allocation Is More Important Than You Think Every time you level up, you also gain attribute points. These points can be assigned to four core stats: Strength, Dexterity, Vitality, and Energy. New players often make the mistake of spreading these points evenly across all attributes. While this might seem balanced, it usually results in a weaker character overall. Instead, most builds prioritize Vitality because it increases your health pool and helps you survive tougher fights. Strength and Dexterity should typically be increased only when necessary to equip certain weapons or armor. Energy increases mana, but most characters gain enough mana from equipment or potions that heavy investment isn’t required. Understanding how attributes affect your character is crucial. A poorly allocated stat distribution can significantly reduce your survivability, especially when facing bosses or elite monsters. Resistances Are Essential for Survival One of the most important defensive mechanics in the game is elemental resistance. Your character can resist four types of elemental damage: fire, cold, lightning, and poison. Early in the game, resistances might not seem particularly important. However, as you progress through the campaign, enemies begin using increasingly powerful elemental attacks. Without proper resistance gear, some monsters can eliminate your character in seconds. The situation becomes even more challenging in Nightmare and Hell difficulties. These modes impose resistance penalties that drastically lower your base resistances. To compensate, players must rely on equipment that boosts elemental resistance. For this reason, experienced players often prioritize gear that increases resistances rather than focusing purely on offensive stats. Death Comes With Real Consequences Unlike many modern RPGs, dying in Diablo II has meaningful consequences. When your character dies, your equipment remains on your corpse at the location where you fell. You respawn in town with nothing equipped and must return to your body to retrieve your items. This mechanic can lead to tense moments. If you died in a dangerous area filled with enemies, you may need to carefully fight your way back to recover your gear. The game also offers a Hardcore mode for players seeking an even greater challenge. In Hardcore mode, death is permanent. If your character dies, the entire character is lost forever. This high-risk gameplay adds intensity to every encounter and makes survival strategies extremely important. Inventory Management Is a Skill The inventory system in Diablo II is intentionally restrictive. Items take up different amounts of space depending on their size, which means your inventory fills quickly. To manage this effectively, you should acquire important utility items early in the game. The Tome of Town Portal and Tome of Identify are two of the most useful purchases you can make from early vendors. These tomes hold multiple scrolls while occupying only a small amount of space. Town Portal scrolls allow you to instantly open a portal back to town, giving you a quick escape from dangerous situations or a convenient way to sell items and repair equipment. Eventually, you will also meet Deckard Cain, a wise scholar who can identify magical items for you without requiring identify scrolls. His presence makes item management far easier. Learn to Use the Horadric Cube One of the most important items in the entire game is the Horadric Cube. You obtain this artifact during the early stages of Act II, and it quickly becomes an essential tool. The cube functions as both a crafting device and additional storage space. Players can combine items inside it to create new ones. For example, three lower-tier gems can be combined into a higher-tier gem. Runes can also be upgraded through cube recipes, and certain crafting formulas allow players to create powerful gear with unique properties. Mastering Horadric Cube recipes opens the door to advanced item crafting and is a crucial step toward optimizing your character’s equipment. Runewords Are Some of the Best Items in the Game Runewords are among the most powerful gear options available in the game. They are created by placing specific runes into socketed equipment in a precise order. When the correct combination is used, the item transforms into a Runeword and gains powerful bonuses. These bonuses can include massive stat boosts, new abilities, faster casting speed, or even teleportation. However, Runewords only work when placed in normal socketed items. If the item is magical, rare, or unique, the runeword will not activate. Because of this rule, players must carefully choose the base item before inserting runes. Learning which item bases are ideal for certain runewords is a major part of the game’s deep itemization system. Mercenaries Can Carry Your Character Mercenaries are AI companions that assist you in combat. You first gain access to one early in the game, and additional types become available in later acts. These companions are far more useful than they might initially appear. Mercenaries can equip weapons, armor, and helmets, making them surprisingly strong when properly geared. Some mercenaries also provide passive aura bonuses that enhance your character’s abilities. For example, certain mercenaries can boost attack speed, defense, or damage output. A well-equipped mercenary can tank enemies, deal additional damage, and help you handle difficult encounters that might otherwise overwhelm your character. Grinding Is Part of the Experience One of the defining aspects of Diablo II is item farming. Unlike story-focused RPGs, this game is built around repeated runs through specific areas to obtain better gear. Players frequently farm certain bosses, elite monsters, or locations known for good loot drops. Over time, these runs gradually improve your character’s equipment and power level. While this process can feel repetitive to some players, it is also one of the most satisfying aspects of the game. The excitement of finally finding a rare item after dozens of runs is a major part of Diablo II’s appeal. Final Thoughts Despite being more than two decades old, the core gameplay of Diablo II remains remarkably deep and engaging. Diablo II: Resurrected preserves everything that made the original game legendary while modernizing its visuals and performance. With patience, strategy, and a bit of cheap D2R Items, you’ll soon find yourself fully immersed in the addictive cycle of monster slaying, treasure hunting, and character progression that has kept players returning to Diablo II for decades. MMOexp.com boasts years of experience in the D2R Items industry and can guarantee to provide you with the highest quality service.
    ·400 Views ·0 Vista previa
  • Elevate your brand's presence! Understanding how to measure brand awareness is a game-changer for any business. In the latest article, "How to measure brand awareness: 9 methods that matter," you'll discover effective strategies like tracking brand mentions and monitoring AI search visibility.

    As someone who's navigated the digital landscape, I can tell you that knowing where your brand stands is just as important as the services you offer. It's empowering to see how your brand resonates with audiences!

    Ready to take your brand to the next level? Dive into these methods and start making data-driven decisions today!

    Read more here: https://www.semrush.com/blog/measure-brand-awareness/

    #BrandAwareness #DigitalMarketing #BusinessGrowth #MarketingStrategy #Inspiration
    🚀 Elevate your brand's presence! Understanding how to measure brand awareness is a game-changer for any business. In the latest article, "How to measure brand awareness: 9 methods that matter," you'll discover effective strategies like tracking brand mentions and monitoring AI search visibility. As someone who's navigated the digital landscape, I can tell you that knowing where your brand stands is just as important as the services you offer. It's empowering to see how your brand resonates with audiences! Ready to take your brand to the next level? Dive into these methods and start making data-driven decisions today! 👉 Read more here: https://www.semrush.com/blog/measure-brand-awareness/ #BrandAwareness #DigitalMarketing #BusinessGrowth #MarketingStrategy #Inspiration
    WWW.SEMRUSH.COM
    How to measure brand awareness: 9 methods that matter
    Measure brand awareness online by tracking brand mentions, monitoring AI search visibility, and more.
    1
    ·120 Views ·0 Vista previa
  • Are you ready to elevate your content strategy in 2026?

    Check out this insightful article on "How to Do Keyword Research in 2026," where you'll discover 6 effective methods to uncover relevant terms that can boost your site's visibility. Understanding the right keywords is crucial for attracting the right audience and enhancing your search engine presence.

    I remember when I first started optimizing my content—finding the right keywords felt overwhelming! But implementing structured research made a world of difference.

    Now, it's your turn! Dive into keyword research and unlock the potential of your content.

    Read more here: https://www.semrush.com/blog/keyword-research/
    #KeywordResearch #SEO #ContentStrategy #DigitalMarketing #Visibility
    🚀 Are you ready to elevate your content strategy in 2026? Check out this insightful article on "How to Do Keyword Research in 2026," where you'll discover 6 effective methods to uncover relevant terms that can boost your site's visibility. Understanding the right keywords is crucial for attracting the right audience and enhancing your search engine presence. I remember when I first started optimizing my content—finding the right keywords felt overwhelming! But implementing structured research made a world of difference. Now, it's your turn! Dive into keyword research and unlock the potential of your content. Read more here: https://www.semrush.com/blog/keyword-research/ #KeywordResearch #SEO #ContentStrategy #DigitalMarketing #Visibility
    WWW.SEMRUSH.COM
    How to Do Keyword Research in 2026 (6 Ways + Framework)
    Learn 6 ways to do keyword research to find relevant terms you can use on your site to grow visibility.
    ·75 Views ·0 Vista previa
  • # Ensuring Reliable Connectivity for Your Smart EV Charger
    The transition towards sustainable transport is accelerating rapidly across Ireland, with record numbers of drivers making the switch to electric vehicles (EVs). One of the greatest benefits of owning an EV is the convenience of charging it overnight in your own driveway, waking up to a full battery every morning. To achieve this efficiently, most homeowners install a dedicated smart charger. However, these modern units are highly complex pieces of technology that require a constant, stable internet connection to function correctly. If your driveway or garage suffers from a weak mobile network, your smart charger cannot communicate with your smartphone app, completely undermining the efficiency and cost-saving benefits of your electric vehicle.

    How Smart Chargers Utilise Mobile Data Networks

    Unlike a simple electrical plug, a modern smart EV charger needs to actively communicate with both your vehicle and your energy provider. To bypass the unreliability of stretching a home Wi-Fi network out into a driveway, most high-end chargers are fitted with an internal cellular SIM card, similar to the one in your smartphone. This cellular connection allows the charger to receive software updates, report energy usage back to the manufacturer, and instantly receive your remote charging commands. When this cellular link is strong, the system works flawlessly. However, if the charger is mounted in a network dead zone, it immediately loses its 'smart' capabilities, reverting to a basic, manual plug.

    The Frustration of Failed Overnight Charging Schedules

    To keep running costs low, Irish EV owners typically schedule their vehicles to charge during the night when off-peak electricity tariffs are significantly cheaper. You set this schedule using an app on your phone, which sends a digital command to the charger on your wall. If the charger cannot pick up a mobile signal, it will never receive the instruction to begin drawing power at 2 am. The result is an incredibly stressful morning where you walk out to your car, ready for your daily commute, only to discover the battery is completely flat. This lack of reliability causes immense frustration and entirely defeats the purpose of investing in a smart home charging system.

    Why Detached Garages and Driveways are Dead Zones

    The placement of your EV charger is usually dictated by where you park your car, which often means mounting the unit on a detached garage, a boundary wall, or the side of a dense concrete extension. These locations are notoriously hostile to radio waves. The thick concrete blocks of a garage, combined with its distance from the nearest network mast, frequently result in zero cellular coverage. Furthermore, if you park a large, metal-bodied electric vehicle directly in front of the charger, the car itself can act as a physical shield, further blocking any weak signal trying to reach the unit’s internal antenna.

    Upgrading Your Property’s Connectivity for EV Management

    You cannot fully embrace the convenience of an electric vehicle if your home infrastructure cannot support its technological requirements. If you are constantly battling with an offline charger, the most robust solution is to amplify the network around your parking area. Installing a dedicated <a href="https://www.smartsatconnect.ie/&quot;>mobile phone signal booster</a> booster allows you to capture a strong signal from high up on your roof and broadcast it powerfully across your driveway or inside your garage. This active amplification ensures that your EV charger remains permanently online, guaranteeing that your overnight charging schedules activate flawlessly every single time, saving you money and preventing morning travel disasters.

    Maximising the Value of Your Green Investment

    Investing in an electric vehicle and a home charging station represents a significant financial commitment to a greener lifestyle. To truly see the return on this investment, the technology must work seamlessly in the background of your daily life. Resolving your driveway’s connectivity issues is the final, crucial step in your EV setup. By ensuring your smart charger has the strong, reliable cellular connection it needs to operate, you empower yourself to manage your vehicle's energy consumption efficiently, taking full advantage of modern smart grid tariffs without the stress of constant technical failures.

    Conclusion

    An electric vehicle is only as smart as the network it connects to. Understanding that your intelligent home charger relies completely on local cellular coverage is essential for maintaining a reliable daily commute. By actively fixing the network dead zones in your driveway or garage, you guarantee that your car is always fully charged, ready to go, and operating at maximum cost-efficiency.

    Call to Action

    Is your smart EV charger constantly disconnecting from its mobile app due to poor driveway reception? Ensure your vehicle charges reliably every night by upgrading your home network. Contact our specialist team today to discuss the perfect amplification solution for your charging setup.
    # Ensuring Reliable Connectivity for Your Smart EV Charger The transition towards sustainable transport is accelerating rapidly across Ireland, with record numbers of drivers making the switch to electric vehicles (EVs). One of the greatest benefits of owning an EV is the convenience of charging it overnight in your own driveway, waking up to a full battery every morning. To achieve this efficiently, most homeowners install a dedicated smart charger. However, these modern units are highly complex pieces of technology that require a constant, stable internet connection to function correctly. If your driveway or garage suffers from a weak mobile network, your smart charger cannot communicate with your smartphone app, completely undermining the efficiency and cost-saving benefits of your electric vehicle. How Smart Chargers Utilise Mobile Data Networks Unlike a simple electrical plug, a modern smart EV charger needs to actively communicate with both your vehicle and your energy provider. To bypass the unreliability of stretching a home Wi-Fi network out into a driveway, most high-end chargers are fitted with an internal cellular SIM card, similar to the one in your smartphone. This cellular connection allows the charger to receive software updates, report energy usage back to the manufacturer, and instantly receive your remote charging commands. When this cellular link is strong, the system works flawlessly. However, if the charger is mounted in a network dead zone, it immediately loses its 'smart' capabilities, reverting to a basic, manual plug. The Frustration of Failed Overnight Charging Schedules To keep running costs low, Irish EV owners typically schedule their vehicles to charge during the night when off-peak electricity tariffs are significantly cheaper. You set this schedule using an app on your phone, which sends a digital command to the charger on your wall. If the charger cannot pick up a mobile signal, it will never receive the instruction to begin drawing power at 2 am. The result is an incredibly stressful morning where you walk out to your car, ready for your daily commute, only to discover the battery is completely flat. This lack of reliability causes immense frustration and entirely defeats the purpose of investing in a smart home charging system. Why Detached Garages and Driveways are Dead Zones The placement of your EV charger is usually dictated by where you park your car, which often means mounting the unit on a detached garage, a boundary wall, or the side of a dense concrete extension. These locations are notoriously hostile to radio waves. The thick concrete blocks of a garage, combined with its distance from the nearest network mast, frequently result in zero cellular coverage. Furthermore, if you park a large, metal-bodied electric vehicle directly in front of the charger, the car itself can act as a physical shield, further blocking any weak signal trying to reach the unit’s internal antenna. Upgrading Your Property’s Connectivity for EV Management You cannot fully embrace the convenience of an electric vehicle if your home infrastructure cannot support its technological requirements. If you are constantly battling with an offline charger, the most robust solution is to amplify the network around your parking area. Installing a dedicated <a href="https://www.smartsatconnect.ie/">mobile phone signal booster</a> booster allows you to capture a strong signal from high up on your roof and broadcast it powerfully across your driveway or inside your garage. This active amplification ensures that your EV charger remains permanently online, guaranteeing that your overnight charging schedules activate flawlessly every single time, saving you money and preventing morning travel disasters. Maximising the Value of Your Green Investment Investing in an electric vehicle and a home charging station represents a significant financial commitment to a greener lifestyle. To truly see the return on this investment, the technology must work seamlessly in the background of your daily life. Resolving your driveway’s connectivity issues is the final, crucial step in your EV setup. By ensuring your smart charger has the strong, reliable cellular connection it needs to operate, you empower yourself to manage your vehicle's energy consumption efficiently, taking full advantage of modern smart grid tariffs without the stress of constant technical failures. Conclusion An electric vehicle is only as smart as the network it connects to. Understanding that your intelligent home charger relies completely on local cellular coverage is essential for maintaining a reliable daily commute. By actively fixing the network dead zones in your driveway or garage, you guarantee that your car is always fully charged, ready to go, and operating at maximum cost-efficiency. Call to Action Is your smart EV charger constantly disconnecting from its mobile app due to poor driveway reception? Ensure your vehicle charges reliably every night by upgrading your home network. Contact our specialist team today to discuss the perfect amplification solution for your charging setup.
    WWW.SMARTSATCONNECT.IE
    Page not found - Smart Sat Connect
    1
    ·434 Views ·0 Vista previa
  • Path of Exile Currency: How to Complete the Trial of Ascendancy

    Path of exile currency is renowned for its complex systems, deep character customization, and challenging endgame content. One of the most pivotal moments in a character’s early progression is the Trial of Ascendancy. This set of trials unlocks the powerful Ascendancy classes, which are specialized subclasses that provide unique passive bonuses and game-changing abilities. Mastering the Trial of Ascendancy is crucial for optimizing your build, unlocking new strategies, and preparing for endgame content. This guide will explain everything you need to know about the Trial of Ascendancy, including mechanics, strategies, class-specific challenges, and tips to ensure success.

    What is the Trial of Ascendancy?

    The Trial of Ascendancy is a sequence of three challenging encounters designed for each of the game’s core classes: Marauder, Ranger, Witch, Duelist, Templar, Shadow, and Scion. Completing these trials is necessary to unlock the Ascendancy subclasses for your chosen class. Each core class has three Ascendancy subclasses, each providing a distinct playstyle and unique set of Ascendancy passive points that significantly enhance your character’s abilities.

    Ascendancy points are extremely valuable, often defining the power curve and efficiency of your character for the rest of the game. Therefore, completing the trials efficiently is essential.

    How to Access the Trials

    The Trial of Ascendancy becomes available in Act II of the main storyline. Players must progress through the campaign until they receive the quest to locate the Labyrinth entrances or trial arenas. The trials are usually found in special areas associated with your character’s class.

    To access the Trial of Ascendancy:

    Complete the main story objectives until the Labyrinth or trial entrance is revealed.

    Follow the clues in your journal to find the location of your class-specific trials.

    Prepare your character with appropriate gear, skills, and flasks.

    Players can fail a trial and retry indefinitely, but efficient completion saves time and ensures early access to Ascendancy points.

    Structure of the Trials

    Each Trial of Ascendancy is designed to test three key skills: combat effectiveness, positioning, and understanding class mechanics. While specific encounters vary by class, all trials share a common structure:

    1. Combat Challenges

    Each trial involves waves of enemies, ranging from normal mobs to elite monsters, culminating in a mini-boss or major encounter. Success depends on your character’s damage output, survivability, and ability to control large groups of enemies. High DPS builds will excel in quickly clearing mobs, while tankier builds can survive longer engagements.

    2. Environmental Hazards and Positioning

    Many trials feature traps, AoE effects, or terrain hazards that require careful positioning. Standing in the wrong place can lead to instant death, even for powerful builds. Observing attack telegraphs, learning enemy patterns, and moving strategically is critical.

    3. Puzzle or Mechanic Challenges

    Some trials introduce mechanics that go beyond simple combat. These might include activating switches in a certain order, navigating trap-filled rooms, or handling class-specific mechanics while under pressure from enemies. Failure to interact correctly with these mechanics can result in wipes, making careful observation as important as combat skill.

    Strategies for Completing the Trials

    While each class has unique trial mechanics, several general strategies apply to all trials:

    Understand Your Build

    Knowing the strengths and weaknesses of your character is essential. Melee builds should leverage leech, armor, and endurance, while ranged or caster builds need mobility and kiting strategies. Understanding your build ensures that you can approach each trial efficiently and minimize risk.

    Defensive Layers are Key

    Even high-damage builds can fail if they ignore defenses. Life, energy shield, resistances, and crowd control mitigation are critical for surviving spike damage. Utility flasks, such as Quicksilver Flask for mobility or Granite Flask for armor, often make the difference between success and failure.

    Observe Mechanics Carefully

    Every trial introduces unique mechanics or environmental hazards. Take time to learn attack patterns, trap placement, and special enemy abilities. Trials are designed to challenge skill and observation, not just damage output.

    Prioritize Mobility

    Many trials require dodging AoEs, traps, or additional enemies while maintaining DPS. Movement skills like Dash, Flame Dash, Blink Arrow, or Shield Charge provide the flexibility to avoid damage while keeping up offensive pressure.

    Efficiently Manage Adds

    Some trials summon additional monsters or waves during encounters. Quickly eliminating these adds prevents being overwhelmed and keeps focus on the main target or mechanic. AoE skills or crowd control abilities are especially useful here.

    Class-Specific Trial Examples

    Each class has trials tailored to test its mechanics:

    Marauder: Trials emphasize tankiness and melee combat. Juggernaut trials focus on endurance, Berserker trials reward aggressive play, and Chieftain trials test elemental interaction and sustain.

    Ranger: Trials challenge movement and projectile precision. Deadeye and Raider trials require avoiding traps and using ranged attacks efficiently.

    Witch: Trials test elemental and minion management. Necromancer trials require controlling minions while surviving environmental hazards.

    Duelist: Trials focus on hybrid melee-ranged engagements and reflect mechanics, requiring precise positioning.

    Templar: Trials challenge elemental defense and positioning, with Inquisitor trials emphasizing elemental penetration.

    Shadow: Trials require trap and movement awareness. Assassin and Saboteur trials test timing and mobility to avoid damage.

    Rewards of Completing the Trials

    Completing all three trials for your class grants Ascendancy points, which are spent on the Ascendancy tree. These points provide substantial bonuses that can dramatically reshape your character’s build. For example:

    Juggernaut (Marauder): Gains bonuses to armor, endurance charges, and sustain.

    Deadeye (Ranger): Improves projectile damage and utility, enhancing ranged attacks.

    Necromancer (Witch): Boosts minion damage, survivability, and summoning efficiency.

    Additionally, trials often reward loot, experience, and access to the Labyrinth, where further Ascendancy points, puzzles, traps, and elite bosses await. Mastery of trial mechanics early prepares players for these more complex challenges later.

    Common Mistakes in Trials

    Many players struggle with the Trial of Ascendancy due to predictable errors:

    Ignoring Mechanics: Failing to recognize traps, AoE attacks, or class-specific mechanics often leads to death.

    Poor Flask Management: Not preparing utility or defensive flasks can be fatal during spike damage.

    Overcommitting DPS: Focusing solely on damage without considering movement or hazards can result in wipes.

    Neglecting Adds: Allowing summoned monsters to overwhelm you is a common mistake.

    Entering Underleveled or Undergeared: Trials expect mid-game readiness; lack of preparation can make encounters unnecessarily difficult.

    Avoiding these mistakes ensures smoother progression and efficient Ascendancy unlocks.

    Tips for Efficient Completion

    Level Appropriately: Ensure your character is within the recommended level range for the trials.

    Gear for Survival: Prioritize resistances, life, and energy shield to survive sudden spikes in damage.

    Learn Boss Patterns: Most trial bosses telegraph attacks; recognizing these patterns reduces unnecessary deaths.

    Use Mobility Skills: Positioning and movement skills allow you to dodge traps, AoEs, and adds effectively.

    Plan Your Ascendancy Choice: Understand how each subclass synergizes with your build to maximize efficiency in trials and later endgame content.

    Conclusion

    The Trial of Ascendancy is one of the most important early-game milestones in Path of Exile, bridging the gap between normal gameplay and the powerful Ascendancy subclasses. Each trial tests combat skill, positioning, and strategic thinking. Successfully completing all three trials for your class unlocks Ascendancy points, providing powerful bonuses that define your character’s capabilities for the rest of the game.

    Completion of these trials requires preparation, observation, and skillful execution. By understanding your build, respecting mechanics, managing adds efficiently, and using mobility effectively, players can conquer these challenges and set the stage for Labyrinth completion and endgame success. Mastering the Trial of Ascendancy is not only rewarding but essential for any exile aiming to unlock their character’s full potential in POE currency buy.

    Every player needs a lot of Path of exile currency, I suggest you go to a third-party website like MMOexp.com to buy some currency.

    Path of Exile Currency: How to Complete the Trial of Ascendancy Path of exile currency is renowned for its complex systems, deep character customization, and challenging endgame content. One of the most pivotal moments in a character’s early progression is the Trial of Ascendancy. This set of trials unlocks the powerful Ascendancy classes, which are specialized subclasses that provide unique passive bonuses and game-changing abilities. Mastering the Trial of Ascendancy is crucial for optimizing your build, unlocking new strategies, and preparing for endgame content. This guide will explain everything you need to know about the Trial of Ascendancy, including mechanics, strategies, class-specific challenges, and tips to ensure success. What is the Trial of Ascendancy? The Trial of Ascendancy is a sequence of three challenging encounters designed for each of the game’s core classes: Marauder, Ranger, Witch, Duelist, Templar, Shadow, and Scion. Completing these trials is necessary to unlock the Ascendancy subclasses for your chosen class. Each core class has three Ascendancy subclasses, each providing a distinct playstyle and unique set of Ascendancy passive points that significantly enhance your character’s abilities. Ascendancy points are extremely valuable, often defining the power curve and efficiency of your character for the rest of the game. Therefore, completing the trials efficiently is essential. How to Access the Trials The Trial of Ascendancy becomes available in Act II of the main storyline. Players must progress through the campaign until they receive the quest to locate the Labyrinth entrances or trial arenas. The trials are usually found in special areas associated with your character’s class. To access the Trial of Ascendancy: Complete the main story objectives until the Labyrinth or trial entrance is revealed. Follow the clues in your journal to find the location of your class-specific trials. Prepare your character with appropriate gear, skills, and flasks. Players can fail a trial and retry indefinitely, but efficient completion saves time and ensures early access to Ascendancy points. Structure of the Trials Each Trial of Ascendancy is designed to test three key skills: combat effectiveness, positioning, and understanding class mechanics. While specific encounters vary by class, all trials share a common structure: 1. Combat Challenges Each trial involves waves of enemies, ranging from normal mobs to elite monsters, culminating in a mini-boss or major encounter. Success depends on your character’s damage output, survivability, and ability to control large groups of enemies. High DPS builds will excel in quickly clearing mobs, while tankier builds can survive longer engagements. 2. Environmental Hazards and Positioning Many trials feature traps, AoE effects, or terrain hazards that require careful positioning. Standing in the wrong place can lead to instant death, even for powerful builds. Observing attack telegraphs, learning enemy patterns, and moving strategically is critical. 3. Puzzle or Mechanic Challenges Some trials introduce mechanics that go beyond simple combat. These might include activating switches in a certain order, navigating trap-filled rooms, or handling class-specific mechanics while under pressure from enemies. Failure to interact correctly with these mechanics can result in wipes, making careful observation as important as combat skill. Strategies for Completing the Trials While each class has unique trial mechanics, several general strategies apply to all trials: Understand Your Build Knowing the strengths and weaknesses of your character is essential. Melee builds should leverage leech, armor, and endurance, while ranged or caster builds need mobility and kiting strategies. Understanding your build ensures that you can approach each trial efficiently and minimize risk. Defensive Layers are Key Even high-damage builds can fail if they ignore defenses. Life, energy shield, resistances, and crowd control mitigation are critical for surviving spike damage. Utility flasks, such as Quicksilver Flask for mobility or Granite Flask for armor, often make the difference between success and failure. Observe Mechanics Carefully Every trial introduces unique mechanics or environmental hazards. Take time to learn attack patterns, trap placement, and special enemy abilities. Trials are designed to challenge skill and observation, not just damage output. Prioritize Mobility Many trials require dodging AoEs, traps, or additional enemies while maintaining DPS. Movement skills like Dash, Flame Dash, Blink Arrow, or Shield Charge provide the flexibility to avoid damage while keeping up offensive pressure. Efficiently Manage Adds Some trials summon additional monsters or waves during encounters. Quickly eliminating these adds prevents being overwhelmed and keeps focus on the main target or mechanic. AoE skills or crowd control abilities are especially useful here. Class-Specific Trial Examples Each class has trials tailored to test its mechanics: Marauder: Trials emphasize tankiness and melee combat. Juggernaut trials focus on endurance, Berserker trials reward aggressive play, and Chieftain trials test elemental interaction and sustain. Ranger: Trials challenge movement and projectile precision. Deadeye and Raider trials require avoiding traps and using ranged attacks efficiently. Witch: Trials test elemental and minion management. Necromancer trials require controlling minions while surviving environmental hazards. Duelist: Trials focus on hybrid melee-ranged engagements and reflect mechanics, requiring precise positioning. Templar: Trials challenge elemental defense and positioning, with Inquisitor trials emphasizing elemental penetration. Shadow: Trials require trap and movement awareness. Assassin and Saboteur trials test timing and mobility to avoid damage. Rewards of Completing the Trials Completing all three trials for your class grants Ascendancy points, which are spent on the Ascendancy tree. These points provide substantial bonuses that can dramatically reshape your character’s build. For example: Juggernaut (Marauder): Gains bonuses to armor, endurance charges, and sustain. Deadeye (Ranger): Improves projectile damage and utility, enhancing ranged attacks. Necromancer (Witch): Boosts minion damage, survivability, and summoning efficiency. Additionally, trials often reward loot, experience, and access to the Labyrinth, where further Ascendancy points, puzzles, traps, and elite bosses await. Mastery of trial mechanics early prepares players for these more complex challenges later. Common Mistakes in Trials Many players struggle with the Trial of Ascendancy due to predictable errors: Ignoring Mechanics: Failing to recognize traps, AoE attacks, or class-specific mechanics often leads to death. Poor Flask Management: Not preparing utility or defensive flasks can be fatal during spike damage. Overcommitting DPS: Focusing solely on damage without considering movement or hazards can result in wipes. Neglecting Adds: Allowing summoned monsters to overwhelm you is a common mistake. Entering Underleveled or Undergeared: Trials expect mid-game readiness; lack of preparation can make encounters unnecessarily difficult. Avoiding these mistakes ensures smoother progression and efficient Ascendancy unlocks. Tips for Efficient Completion Level Appropriately: Ensure your character is within the recommended level range for the trials. Gear for Survival: Prioritize resistances, life, and energy shield to survive sudden spikes in damage. Learn Boss Patterns: Most trial bosses telegraph attacks; recognizing these patterns reduces unnecessary deaths. Use Mobility Skills: Positioning and movement skills allow you to dodge traps, AoEs, and adds effectively. Plan Your Ascendancy Choice: Understand how each subclass synergizes with your build to maximize efficiency in trials and later endgame content. Conclusion The Trial of Ascendancy is one of the most important early-game milestones in Path of Exile, bridging the gap between normal gameplay and the powerful Ascendancy subclasses. Each trial tests combat skill, positioning, and strategic thinking. Successfully completing all three trials for your class unlocks Ascendancy points, providing powerful bonuses that define your character’s capabilities for the rest of the game. Completion of these trials requires preparation, observation, and skillful execution. By understanding your build, respecting mechanics, managing adds efficiently, and using mobility effectively, players can conquer these challenges and set the stage for Labyrinth completion and endgame success. Mastering the Trial of Ascendancy is not only rewarding but essential for any exile aiming to unlock their character’s full potential in POE currency buy. Every player needs a lot of Path of exile currency, I suggest you go to a third-party website like MMOexp.com to buy some currency.
    ·879 Views ·0 Vista previa
  • Expanding your business on Amazon in the UAE requires more than just listing products—it takes strategic planning, expert guidance, and a deep understanding of the regional market. At GrowithAmazon, we provide specialized Amazon Consulting Services Uae to help brands and sellers succeed on the world’s leading online marketplace.

    Our team of Amazon consultants partners with businesses at every stage, from launching a new account to scaling operations across the Middle East. We create customized strategies that cover account setup, product listing optimization, keyword research, and branding to ensure your products rank higher and convert better. Through data-driven advertising campaigns, including Amazon PPC and Sponsored Ads, we help maximize visibility while controlling costs.

    For more info:https://growithamazon.com/services/amazon-consultancy-services/
    Expanding your business on Amazon in the UAE requires more than just listing products—it takes strategic planning, expert guidance, and a deep understanding of the regional market. At GrowithAmazon, we provide specialized Amazon Consulting Services Uae to help brands and sellers succeed on the world’s leading online marketplace. Our team of Amazon consultants partners with businesses at every stage, from launching a new account to scaling operations across the Middle East. We create customized strategies that cover account setup, product listing optimization, keyword research, and branding to ensure your products rank higher and convert better. Through data-driven advertising campaigns, including Amazon PPC and Sponsored Ads, we help maximize visibility while controlling costs. For more info:https://growithamazon.com/services/amazon-consultancy-services/
    GROWITHAMAZON.COM
    Amazon Consulting Services - Amazon Consultant
    Maximize your Amazon sales with our expert Amazon consultancy services. Our professional Amazon consultants provide tailored strategies.
    ·287 Views ·0 Vista previa
  • Ashes of Creation Gold: Mastering Tank Builds

    In the expansive world of Ashes of Creation Gold, players are introduced to a dynamic and ever-changing landscape where every role plays a pivotal part in the success of a group. The tank role, in particular, is a cornerstone in both PvE (Player vs Environment) and PvP (Player vs Player) content. As a tank, your primary responsibility is to absorb incoming damage, control the battlefield, and ensure that your allies remain unharmed. This comprehensive guide will walk you through the essentials of building a tank in Ashes of Creation, focusing on key mechanics, attributes, abilities, gear, and strategies to help you excel in the role.

    Understanding the Tank Role

    Before delving into the specifics of tanking in Ashes of Creation, it’s essential to understand what being a tank entails. The tank’s role is both simple and complex at the same time. A tank’s primary function is to act as the damage sponge for the group, absorbing hits that would otherwise fall on weaker members of the party. Tanks are tasked with keeping enemies focused on them, allowing damage dealers to unleash their full potential without fear of being targeted.

    The tank also controls crowd flow, meaning that they need to manage enemy positions, prevent stragglers from flanking, and control aggro, which is the threat that enemies feel toward a player. This threat can be manipulated using taunts, threat-generating abilities, and strategic positioning. Tanks are often the first line of defense in high-stakes encounters like raids, dungeons, or PvP battles, where managing incoming damage and controlling enemy movement is vital to the group’s survival.

    Choosing the Right Class

    The next step in crafting a tank build is selecting the appropriate archetype and advanced class. In Ashes of Creation, the class system is structured around Archetypes and Specializations. When it comes to tanking, the Knight archetype is the most viable option, as it is designed with high survivability and threat management in mind.

    Knight Archetype

    The Knight is a versatile archetype, well-suited to tanking roles due to its inherent defensive capabilities. A Knight can specialize into several classes, each bringing a unique approach to tanking. The three main specializations available to the Knight archetype are:

    Paladin: The Paladin is a defensive support tank, offering strong self-healing abilities, damage mitigation, and group support through buffs and debuffs. Paladins can keep themselves and their allies alive in prolonged fights, making them an excellent choice for sustained encounters.

    Guardian: Guardians are the classic “big, tough tank.” They focus on soaking up massive amounts of damage and controlling enemy movement. Their strength lies in their ability to lock down enemies with crowd control (CC) abilities and their formidable damage mitigation.

    Warlord: A more offensive tanking class, the Warlord excels at controlling multiple enemies simultaneously. While they may not have as much raw damage mitigation as the Guardian or Paladin, their ability to contribute damage while still keeping enemies focused on them makes them a flexible option for both tanking and dealing damage.

    For this guide, we will focus primarily on the Paladin specialization, as it is a popular choice for players who enjoy tanking while also providing support to their team.

    Key Attributes for Tanking

    When building a tank in Ashes of Creation, the right set of attributes is vital for ensuring you can withstand damage and perform your role effectively. The game uses a stat-based system, and certain attributes should be prioritized for tanking:

    1. Constitution

    Constitution is one of the most important stats for a tank. It directly affects your health pool and survivability. A tank needs to have a substantial amount of health to endure sustained damage in both PvE and PvP. A higher Constitution allows you to soak more damage and survive longer, making you the effective damage sponge your team needs.

    2. Endurance

    Endurance increases your stamina and your ability to block or mitigate incoming attacks. While Constitution boosts your overall health, Endurance helps with your damage reduction capabilities. It’s especially important for Paladins, who will be using abilities like Shield Wall and other damage mitigation skills. Ensuring that your Endurance is high enough will allow you to sustain these abilities longer and help with mobility, so you can reposition quickly if needed.

    3. Armor

    Armor is a crucial factor in reducing physical damage. As a tank, your job is to absorb as much damage as possible, and a higher Armor rating will make you more resilient against physical attacks. In many cases, the best gear for a tank will be heavy armor, as it provides the highest level of damage reduction.

    4. Agility

    While Agility isn’t a tank’s primary focus, a moderate amount of it can be useful for mobility. Agility improves your dodge chance, allowing you to avoid some attacks, especially in high-paced PvP encounters or against bosses with fast-moving abilities. While you should not neglect more vital stats like Constitution and Endurance, having a bit of Agility can improve your overall survivability in certain situations.

    Tank Abilities and Skills

    Every tank must have a well-rounded set of abilities that allow them to control aggro, mitigate damage, and protect their allies. Here are some key abilities you should focus on when building a tank:

    1. Taunt Abilities

    Taunts are core to a tank’s ability to manage aggro. These abilities force enemies to focus their attacks on the tank instead of other party members. Effective taunting abilities not only generate threat but can also increase the tank’s control over the battlefield, ensuring that damage dealers and healers remain unharmed.

    Aggro Generation: Your taunt abilities should be used to pull enemies off your damage dealers. Be mindful of the threat generated by your DPS—if they surpass you in damage output, it could cause the enemy to switch targets.

    Area-of-Effect Taunts: Some taunts have a broader range, allowing you to gather multiple enemies and keep them under your control. These are particularly useful in dungeon runs or group combat.

    2. Defensive Abilities

    The foundation of any tank is their ability to absorb damage. Defensive abilities provide crucial damage mitigation, allowing tanks to take hits that would otherwise wipe out squishy party members.

    Shield Wall: This ability significantly reduces the amount of damage taken over a short period, making it indispensable in high-damage phases of a fight.

    Defender’s Resolve: A self-buff that increases your resilience against incoming damage, often coupled with a boost in damage reduction or a temporary health shield.

    Divine Shield: A powerful ability that grants complete immunity to damage for a short time, perfect for avoiding lethal damage spikes during boss fights.

    3. Crowd Control Abilities

    Crowd control (CC) is essential for managing multiple enemies or preventing specific high-priority threats from overwhelming your party.

    Stuns: Stuns prevent enemies from acting for a short time, allowing you to control their movement and prevent them from dealing damage.

    Roots and Slows: Roots keep enemies from moving, while slows reduce their overall mobility. These can be crucial when dealing with fast-moving mobs or preventing enemies from flanking your group.

    4. Support Abilities

    Although tanking is primarily about survival, supporting your team through healing, buffs, or debuffs can significantly impact the outcome of a fight.

    Lay on Hands: A classic Paladin ability that allows you to heal yourself or an ally. This is particularly useful in extended fights where your healer may be overwhelmed.

    Aegis of Protection: A supportive AoE ability that grants damage reduction to allies within a certain range. This can turn the tide of battle by boosting your party’s survivability when the going gets tough.

    Gear and Equipment

    Your gear plays a crucial role in enhancing your tanking capabilities. As a tank, your main priority is to maximize survivability and threat generation.

    1. Armor

    Plate armor is the go-to for any tank, as it offers the best damage reduction and protection from physical attacks. Make sure you prioritize armor pieces that increase your Constitution, Endurance, and Armor.

    2. Weapons

    A sword and shield combination is optimal for most tanks. The shield not only adds protection but also increases your block chance, while the sword offers consistent threat generation. For Paladins, this setup also provides synergy with their defensive abilities, making it easier to generate and maintain aggro.

    Some tanks may prefer a two-handed weapon for higher damage output and threat generation. However, this comes at the cost of reduced defensive capabilities. Two-handed weapons are better suited for tanks that want to balance offense with defense.

    3. Enchantments and Glyphs

    Certain enchantments can provide additional damage reduction or threat generation. Make sure to use glyphs that increase your survivability or bolster your taunts. Health regeneration enchantments can also keep you alive longer in tough fights.

    Conclusion

    Tanking in Ashes of Creation is a rewarding yet demanding role that requires a mix of strategic thinking, reaction time, and team coordination. The Paladin offers a balanced tanking option, with a focus on defense, healing, and providing support to your team. By prioritizing the right attributes, skills, and gear, you can create a tank that excels at managing damage, controlling enemies, and ensuring the safety of your party. Whether you're diving into PvE content or engaging in PvP battles, mastering the tank role will be key to buy Ashes of Creation Gold in the world of Ashes of Creation.

    MMOEXP The purchase of Ashes of Creation Gold was really fast, will definitely only use this website in the future. The live chat was also very helpful.
    Ashes of Creation Gold: Mastering Tank Builds In the expansive world of Ashes of Creation Gold, players are introduced to a dynamic and ever-changing landscape where every role plays a pivotal part in the success of a group. The tank role, in particular, is a cornerstone in both PvE (Player vs Environment) and PvP (Player vs Player) content. As a tank, your primary responsibility is to absorb incoming damage, control the battlefield, and ensure that your allies remain unharmed. This comprehensive guide will walk you through the essentials of building a tank in Ashes of Creation, focusing on key mechanics, attributes, abilities, gear, and strategies to help you excel in the role. Understanding the Tank Role Before delving into the specifics of tanking in Ashes of Creation, it’s essential to understand what being a tank entails. The tank’s role is both simple and complex at the same time. A tank’s primary function is to act as the damage sponge for the group, absorbing hits that would otherwise fall on weaker members of the party. Tanks are tasked with keeping enemies focused on them, allowing damage dealers to unleash their full potential without fear of being targeted. The tank also controls crowd flow, meaning that they need to manage enemy positions, prevent stragglers from flanking, and control aggro, which is the threat that enemies feel toward a player. This threat can be manipulated using taunts, threat-generating abilities, and strategic positioning. Tanks are often the first line of defense in high-stakes encounters like raids, dungeons, or PvP battles, where managing incoming damage and controlling enemy movement is vital to the group’s survival. Choosing the Right Class The next step in crafting a tank build is selecting the appropriate archetype and advanced class. In Ashes of Creation, the class system is structured around Archetypes and Specializations. When it comes to tanking, the Knight archetype is the most viable option, as it is designed with high survivability and threat management in mind. Knight Archetype The Knight is a versatile archetype, well-suited to tanking roles due to its inherent defensive capabilities. A Knight can specialize into several classes, each bringing a unique approach to tanking. The three main specializations available to the Knight archetype are: Paladin: The Paladin is a defensive support tank, offering strong self-healing abilities, damage mitigation, and group support through buffs and debuffs. Paladins can keep themselves and their allies alive in prolonged fights, making them an excellent choice for sustained encounters. Guardian: Guardians are the classic “big, tough tank.” They focus on soaking up massive amounts of damage and controlling enemy movement. Their strength lies in their ability to lock down enemies with crowd control (CC) abilities and their formidable damage mitigation. Warlord: A more offensive tanking class, the Warlord excels at controlling multiple enemies simultaneously. While they may not have as much raw damage mitigation as the Guardian or Paladin, their ability to contribute damage while still keeping enemies focused on them makes them a flexible option for both tanking and dealing damage. For this guide, we will focus primarily on the Paladin specialization, as it is a popular choice for players who enjoy tanking while also providing support to their team. Key Attributes for Tanking When building a tank in Ashes of Creation, the right set of attributes is vital for ensuring you can withstand damage and perform your role effectively. The game uses a stat-based system, and certain attributes should be prioritized for tanking: 1. Constitution Constitution is one of the most important stats for a tank. It directly affects your health pool and survivability. A tank needs to have a substantial amount of health to endure sustained damage in both PvE and PvP. A higher Constitution allows you to soak more damage and survive longer, making you the effective damage sponge your team needs. 2. Endurance Endurance increases your stamina and your ability to block or mitigate incoming attacks. While Constitution boosts your overall health, Endurance helps with your damage reduction capabilities. It’s especially important for Paladins, who will be using abilities like Shield Wall and other damage mitigation skills. Ensuring that your Endurance is high enough will allow you to sustain these abilities longer and help with mobility, so you can reposition quickly if needed. 3. Armor Armor is a crucial factor in reducing physical damage. As a tank, your job is to absorb as much damage as possible, and a higher Armor rating will make you more resilient against physical attacks. In many cases, the best gear for a tank will be heavy armor, as it provides the highest level of damage reduction. 4. Agility While Agility isn’t a tank’s primary focus, a moderate amount of it can be useful for mobility. Agility improves your dodge chance, allowing you to avoid some attacks, especially in high-paced PvP encounters or against bosses with fast-moving abilities. While you should not neglect more vital stats like Constitution and Endurance, having a bit of Agility can improve your overall survivability in certain situations. Tank Abilities and Skills Every tank must have a well-rounded set of abilities that allow them to control aggro, mitigate damage, and protect their allies. Here are some key abilities you should focus on when building a tank: 1. Taunt Abilities Taunts are core to a tank’s ability to manage aggro. These abilities force enemies to focus their attacks on the tank instead of other party members. Effective taunting abilities not only generate threat but can also increase the tank’s control over the battlefield, ensuring that damage dealers and healers remain unharmed. Aggro Generation: Your taunt abilities should be used to pull enemies off your damage dealers. Be mindful of the threat generated by your DPS—if they surpass you in damage output, it could cause the enemy to switch targets. Area-of-Effect Taunts: Some taunts have a broader range, allowing you to gather multiple enemies and keep them under your control. These are particularly useful in dungeon runs or group combat. 2. Defensive Abilities The foundation of any tank is their ability to absorb damage. Defensive abilities provide crucial damage mitigation, allowing tanks to take hits that would otherwise wipe out squishy party members. Shield Wall: This ability significantly reduces the amount of damage taken over a short period, making it indispensable in high-damage phases of a fight. Defender’s Resolve: A self-buff that increases your resilience against incoming damage, often coupled with a boost in damage reduction or a temporary health shield. Divine Shield: A powerful ability that grants complete immunity to damage for a short time, perfect for avoiding lethal damage spikes during boss fights. 3. Crowd Control Abilities Crowd control (CC) is essential for managing multiple enemies or preventing specific high-priority threats from overwhelming your party. Stuns: Stuns prevent enemies from acting for a short time, allowing you to control their movement and prevent them from dealing damage. Roots and Slows: Roots keep enemies from moving, while slows reduce their overall mobility. These can be crucial when dealing with fast-moving mobs or preventing enemies from flanking your group. 4. Support Abilities Although tanking is primarily about survival, supporting your team through healing, buffs, or debuffs can significantly impact the outcome of a fight. Lay on Hands: A classic Paladin ability that allows you to heal yourself or an ally. This is particularly useful in extended fights where your healer may be overwhelmed. Aegis of Protection: A supportive AoE ability that grants damage reduction to allies within a certain range. This can turn the tide of battle by boosting your party’s survivability when the going gets tough. Gear and Equipment Your gear plays a crucial role in enhancing your tanking capabilities. As a tank, your main priority is to maximize survivability and threat generation. 1. Armor Plate armor is the go-to for any tank, as it offers the best damage reduction and protection from physical attacks. Make sure you prioritize armor pieces that increase your Constitution, Endurance, and Armor. 2. Weapons A sword and shield combination is optimal for most tanks. The shield not only adds protection but also increases your block chance, while the sword offers consistent threat generation. For Paladins, this setup also provides synergy with their defensive abilities, making it easier to generate and maintain aggro. Some tanks may prefer a two-handed weapon for higher damage output and threat generation. However, this comes at the cost of reduced defensive capabilities. Two-handed weapons are better suited for tanks that want to balance offense with defense. 3. Enchantments and Glyphs Certain enchantments can provide additional damage reduction or threat generation. Make sure to use glyphs that increase your survivability or bolster your taunts. Health regeneration enchantments can also keep you alive longer in tough fights. Conclusion Tanking in Ashes of Creation is a rewarding yet demanding role that requires a mix of strategic thinking, reaction time, and team coordination. The Paladin offers a balanced tanking option, with a focus on defense, healing, and providing support to your team. By prioritizing the right attributes, skills, and gear, you can create a tank that excels at managing damage, controlling enemies, and ensuring the safety of your party. Whether you're diving into PvE content or engaging in PvP battles, mastering the tank role will be key to buy Ashes of Creation Gold in the world of Ashes of Creation. MMOEXP The purchase of Ashes of Creation Gold was really fast, will definitely only use this website in the future. The live chat was also very helpful.
    ·1K Views ·0 Vista previa
  • Path of Exile Currency: How to Defeat Eater of Worlds

    Path of exile currency is known for its challenging endgame content, intricate mechanics, and high-stakes boss encounters. One of the most formidable bosses players face is the Eater of Worlds. This fight tests a combination of DPS, survivability, positioning, and awareness, making it a true challenge even for experienced exiles. Understanding the fight mechanics, planning your strategy, and preparing your build and flasks are crucial to success. This guide will cover everything from boss phases to tips for specific builds and group strategies.

    Overview of the Eater of Worlds

    The Eater of Worlds is an endgame boss designed to test player skill and preparation. Found in certain high-tier maps or league-specific content, the fight is both punishing and rewarding. Defeating this boss provides access to high-value loot, including rare currency items, unique gear, and crafting materials. The encounter is structured to challenge players in several ways:

    High damage output: The boss employs a mix of AoE and single-target attacks.

    Environmental hazards: The arena often contains damaging zones or traps.

    Summons and adds: Waves of minions spawn throughout the fight, adding pressure and requiring multitasking.

    Phase-based mechanics: The fight evolves as the boss’s health drops, with new attacks and hazards introduced.

    Success in this encounter requires understanding all these elements and approaching the fight with a clear strategy.

    Phases of the Fight

    The Eater of Worlds fight is divided into multiple phases, each with distinct mechanics that players must adapt to.

    Phase 1: Initial Engagement

    The fight begins with the boss in a semi-stationary state, using basic attacks and summoning minor adds. Key mechanics include:

    Long-range AoE attacks: These attacks deal significant damage and often cover large portions of the arena.

    Adds spawn periodically: While individually weak, adds can overwhelm unprepared players.

    Positioning is critical: Maintaining distance from AoEs while dealing damage is essential.

    Strategy: Clear adds efficiently using AoE or crowd control skills. Position your character in a safe zone, and use mobility skills like Dash, Blink Arrow, or Shield Charge to avoid incoming AoEs. Ranged characters should maintain mid-range to balance damage output and safety.

    Phase 2: Environmental Hazards

    Once the boss reaches a certain health threshold, environmental hazards appear:

    Damaging zones or debuffs: Certain areas of the arena apply continuous damage over time or debuffs to players standing within them.

    Trap mechanics: Explosive zones, spikes, or AoE effects require constant attention.

    More frequent adds: Summons increase in strength or number.

    Strategy: Use flasks to mitigate damage from hazards, such as immunity flasks or movement speed flasks. Keep moving to avoid prolonged exposure to environmental damage. Focus on maintaining a balance between clearing adds and DPSing the boss.

    Phase 3: Aggressive Damage Phase

    During this phase, the Eater of Worlds becomes much more aggressive:

    Rapid melee or ranged attacks: Attack speed and damage increase, making mispositioning costly.

    Debuffs and crowd control: The boss can stun, knockback, or otherwise disrupt player movement.

    Summons become more dangerous: Elite or corrupted adds appear, adding pressure.

    Strategy: Ensure that your defensive layers—armor, evasion, or energy shield—are strong enough to handle spike damage. Use mobility to kite the boss and manage adds efficiently. Caster and ranged builds should focus on high burst damage while avoiding hazards.

    Phase 4: Enrage Phase

    As the boss reaches critical health, it enters its enrage phase:

    Attack speed increases: The boss hits faster and harder, punishing mistakes.

    AoE attacks become unavoidable: Patterns overlap, leaving little safe space if not careful.

    Adds spawn near the player: Close-range adds can overwhelm melee builds quickly.

    Strategy: Save your strongest offensive cooldowns for this phase to maximize DPS. Maintain constant movement to avoid overlapping AoEs and hazards. Defensive flasks and utility skills should be used strategically to survive the increased pressure.

    Key Mechanics and How to Counter Them

    The Eater of Worlds has several mechanics that can be fatal if ignored:

    AoE Damage: The boss frequently uses area attacks. Avoid standing in telegraphed zones.

    Minion Waves: Adds can disrupt positioning and amplify incoming damage. Prioritize AoE skills to handle them quickly.

    Debuffs and Status Effects: Bleed, poison, or elemental DoTs are common. Use flasks and resistances to mitigate them.

    Knockbacks and Crowd Control: Some attacks displace the player, which can lead to hazards or death. Keep movement skills ready.

    Environmental Hazards: Lava zones, spikes, or poison clouds require constant awareness and mobility.

    Recognizing and responding to these mechanics quickly is essential for a smooth fight.

    Build Recommendations

    Different builds handle the Eater of Worlds in distinct ways. Here’s how melee, ranged, and caster builds can approach the fight:

    Melee Builds

    Leech and sustain: Vital for surviving the high damage output.

    AoE skills: Cyclone, Earthquake, or Ground Slam clear adds while damaging the boss.

    Mobility skills: Leap Slam or Shield Charge are essential for repositioning during hazards.

    Ranged Builds

    Kiting and mobility: Keeps distance from AoEs and melee attacks.

    Projectile skills: Tornado Shot, Barrage, or Freezing Pulse allow safe damage while moving.

    Flasks for speed and mitigation: Quicksilver Flask and defensive flasks increase survivability.

    Caster Builds

    High burst damage: Ideal for finishing the boss during the enrage phase.

    AoE spells: Arc, Fireball, or Blade Vortex help manage adds.

    Energy shield management: Use flasks and defensive layers to survive spike damage.

    Movement skills: Teleport, Flame Dash, or Dash help maintain casting while avoiding hazards.

    Flasks and Utility

    Flasks are critical for survival:

    Life Flask: Instant healing for spike damage or DOT effects.

    Quicksilver Flask: Mobility to dodge AoEs.

    Granite or Stibnite Flask: Provides armor, evasion, or block for defensive boosts.

    Utility Flasks: Immunity flasks for bleed, freeze, or shock mitigate hazardous mechanics.

    Proper flask management often determines success in this fight, especially in later phases with overlapping hazards.

    Group Strategies

    If fighting the Eater of Worlds in a party:

    Assign roles: One player focuses on adds while another DPSes the boss.

    Communicate mechanics: Alert teammates to AoEs, traps, or dangerous adds.

    Crowd control: Use stuns or slows to manage summons.

    Coordinate defensive cooldowns: Ensure team survivability during enrage phases.

    Teamwork can simplify this fight significantly and make it more forgiving than solo attempts.

    Common Mistakes

    Ignoring hazards: Standing in damaging zones is a frequent cause of death.

    Over-focusing on adds: Losing sight of the boss’s mechanics can extend the fight unnecessarily.

    Poor flask timing: Not using flasks at critical moments often results in sudden deaths.

    Overcommitting melee: Engaging too closely without mitigation leads to high-risk situations.

    Neglecting telegraphed attacks: Failing to move according to visual or audio cues can be fatal.

    Avoiding these mistakes is key to consistent success.

    Conclusion

    The Eater of Worlds is one of Path of Exile’s most challenging bosses, designed to test DPS, positioning, mechanics awareness, and resource management. Understanding the boss’s phases, environmental hazards, and mechanics is crucial for survival. By preparing your build, managing flasks efficiently, and adapting to each phase, players can conquer this fight and reap high-value rewards.

    Whether using melee, ranged, or caster builds, strategic play, movement, and crowd control are essential. Group play offers additional safety and efficiency through teamwork, but soloing the boss is also possible with careful planning. Defeating the Eater of Worlds not only provides valuable loot and crafting opportunities but also serves as a testament to a player’s mastery of PoE’s challenging mechanics.

    Preparation, awareness, and execution are the keys to success against this formidable foe. Mastering the fight ensures that exiles are ready to tackle even greater challenges in the endgame of cheap POE orbs.

    Every player needs a lot of Path of exile currency, I suggest you go to a third-party website like MMOexp.com to buy some currency.
    Path of Exile Currency: How to Defeat Eater of Worlds Path of exile currency is known for its challenging endgame content, intricate mechanics, and high-stakes boss encounters. One of the most formidable bosses players face is the Eater of Worlds. This fight tests a combination of DPS, survivability, positioning, and awareness, making it a true challenge even for experienced exiles. Understanding the fight mechanics, planning your strategy, and preparing your build and flasks are crucial to success. This guide will cover everything from boss phases to tips for specific builds and group strategies. Overview of the Eater of Worlds The Eater of Worlds is an endgame boss designed to test player skill and preparation. Found in certain high-tier maps or league-specific content, the fight is both punishing and rewarding. Defeating this boss provides access to high-value loot, including rare currency items, unique gear, and crafting materials. The encounter is structured to challenge players in several ways: High damage output: The boss employs a mix of AoE and single-target attacks. Environmental hazards: The arena often contains damaging zones or traps. Summons and adds: Waves of minions spawn throughout the fight, adding pressure and requiring multitasking. Phase-based mechanics: The fight evolves as the boss’s health drops, with new attacks and hazards introduced. Success in this encounter requires understanding all these elements and approaching the fight with a clear strategy. Phases of the Fight The Eater of Worlds fight is divided into multiple phases, each with distinct mechanics that players must adapt to. Phase 1: Initial Engagement The fight begins with the boss in a semi-stationary state, using basic attacks and summoning minor adds. Key mechanics include: Long-range AoE attacks: These attacks deal significant damage and often cover large portions of the arena. Adds spawn periodically: While individually weak, adds can overwhelm unprepared players. Positioning is critical: Maintaining distance from AoEs while dealing damage is essential. Strategy: Clear adds efficiently using AoE or crowd control skills. Position your character in a safe zone, and use mobility skills like Dash, Blink Arrow, or Shield Charge to avoid incoming AoEs. Ranged characters should maintain mid-range to balance damage output and safety. Phase 2: Environmental Hazards Once the boss reaches a certain health threshold, environmental hazards appear: Damaging zones or debuffs: Certain areas of the arena apply continuous damage over time or debuffs to players standing within them. Trap mechanics: Explosive zones, spikes, or AoE effects require constant attention. More frequent adds: Summons increase in strength or number. Strategy: Use flasks to mitigate damage from hazards, such as immunity flasks or movement speed flasks. Keep moving to avoid prolonged exposure to environmental damage. Focus on maintaining a balance between clearing adds and DPSing the boss. Phase 3: Aggressive Damage Phase During this phase, the Eater of Worlds becomes much more aggressive: Rapid melee or ranged attacks: Attack speed and damage increase, making mispositioning costly. Debuffs and crowd control: The boss can stun, knockback, or otherwise disrupt player movement. Summons become more dangerous: Elite or corrupted adds appear, adding pressure. Strategy: Ensure that your defensive layers—armor, evasion, or energy shield—are strong enough to handle spike damage. Use mobility to kite the boss and manage adds efficiently. Caster and ranged builds should focus on high burst damage while avoiding hazards. Phase 4: Enrage Phase As the boss reaches critical health, it enters its enrage phase: Attack speed increases: The boss hits faster and harder, punishing mistakes. AoE attacks become unavoidable: Patterns overlap, leaving little safe space if not careful. Adds spawn near the player: Close-range adds can overwhelm melee builds quickly. Strategy: Save your strongest offensive cooldowns for this phase to maximize DPS. Maintain constant movement to avoid overlapping AoEs and hazards. Defensive flasks and utility skills should be used strategically to survive the increased pressure. Key Mechanics and How to Counter Them The Eater of Worlds has several mechanics that can be fatal if ignored: AoE Damage: The boss frequently uses area attacks. Avoid standing in telegraphed zones. Minion Waves: Adds can disrupt positioning and amplify incoming damage. Prioritize AoE skills to handle them quickly. Debuffs and Status Effects: Bleed, poison, or elemental DoTs are common. Use flasks and resistances to mitigate them. Knockbacks and Crowd Control: Some attacks displace the player, which can lead to hazards or death. Keep movement skills ready. Environmental Hazards: Lava zones, spikes, or poison clouds require constant awareness and mobility. Recognizing and responding to these mechanics quickly is essential for a smooth fight. Build Recommendations Different builds handle the Eater of Worlds in distinct ways. Here’s how melee, ranged, and caster builds can approach the fight: Melee Builds Leech and sustain: Vital for surviving the high damage output. AoE skills: Cyclone, Earthquake, or Ground Slam clear adds while damaging the boss. Mobility skills: Leap Slam or Shield Charge are essential for repositioning during hazards. Ranged Builds Kiting and mobility: Keeps distance from AoEs and melee attacks. Projectile skills: Tornado Shot, Barrage, or Freezing Pulse allow safe damage while moving. Flasks for speed and mitigation: Quicksilver Flask and defensive flasks increase survivability. Caster Builds High burst damage: Ideal for finishing the boss during the enrage phase. AoE spells: Arc, Fireball, or Blade Vortex help manage adds. Energy shield management: Use flasks and defensive layers to survive spike damage. Movement skills: Teleport, Flame Dash, or Dash help maintain casting while avoiding hazards. Flasks and Utility Flasks are critical for survival: Life Flask: Instant healing for spike damage or DOT effects. Quicksilver Flask: Mobility to dodge AoEs. Granite or Stibnite Flask: Provides armor, evasion, or block for defensive boosts. Utility Flasks: Immunity flasks for bleed, freeze, or shock mitigate hazardous mechanics. Proper flask management often determines success in this fight, especially in later phases with overlapping hazards. Group Strategies If fighting the Eater of Worlds in a party: Assign roles: One player focuses on adds while another DPSes the boss. Communicate mechanics: Alert teammates to AoEs, traps, or dangerous adds. Crowd control: Use stuns or slows to manage summons. Coordinate defensive cooldowns: Ensure team survivability during enrage phases. Teamwork can simplify this fight significantly and make it more forgiving than solo attempts. Common Mistakes Ignoring hazards: Standing in damaging zones is a frequent cause of death. Over-focusing on adds: Losing sight of the boss’s mechanics can extend the fight unnecessarily. Poor flask timing: Not using flasks at critical moments often results in sudden deaths. Overcommitting melee: Engaging too closely without mitigation leads to high-risk situations. Neglecting telegraphed attacks: Failing to move according to visual or audio cues can be fatal. Avoiding these mistakes is key to consistent success. Conclusion The Eater of Worlds is one of Path of Exile’s most challenging bosses, designed to test DPS, positioning, mechanics awareness, and resource management. Understanding the boss’s phases, environmental hazards, and mechanics is crucial for survival. By preparing your build, managing flasks efficiently, and adapting to each phase, players can conquer this fight and reap high-value rewards. Whether using melee, ranged, or caster builds, strategic play, movement, and crowd control are essential. Group play offers additional safety and efficiency through teamwork, but soloing the boss is also possible with careful planning. Defeating the Eater of Worlds not only provides valuable loot and crafting opportunities but also serves as a testament to a player’s mastery of PoE’s challenging mechanics. Preparation, awareness, and execution are the keys to success against this formidable foe. Mastering the fight ensures that exiles are ready to tackle even greater challenges in the endgame of cheap POE orbs. Every player needs a lot of Path of exile currency, I suggest you go to a third-party website like MMOexp.com to buy some currency.
    ·2K Views ·0 Vista previa
  • Madden 26 Coins: Complete Roster Update Instructions

    In Madden 26 coins, having up-to-date rosters is essential for an authentic and competitive football experience. The NFL is constantly changing, with trades, free-agent signings, rookies entering the league, and player ratings fluctuating based on real-world performance. Playing with outdated rosters can make games feel unrealistic and reduce the challenge and enjoyment of the game. Whether you are playing Franchise Mode, Ultimate Team, or online head-to-head matches, keeping your rosters current ensures your gameplay reflects the real NFL season. This guide will walk you through everything you need to know to update rosters in Madden 26, including both official updates and community-created roster files.

    Why Updated Rosters Are Important

    Updated rosters in Madden 26 do more than just reflect current NFL lineups—they affect how you experience the game on multiple levels. In Franchise Mode, outdated rosters can throw off your drafting, trades, and team-building decisions. Playing online against others with outdated rosters can create unfair advantages or mismatches. Even in Ultimate Team, having accurate rosters ensures you are using the latest player cards and making strategic decisions based on current NFL talent. Simply put, updated rosters increase realism, fairness, and overall enjoyment.

    The Madden development team frequently releases official roster updates throughout the NFL season. These updates reflect trades, injuries, rating changes, and other real-life events. By keeping your rosters up-to-date, you ensure that your Madden 26 experience remains dynamic and accurate.

    Connecting to EA Servers

    The first step in updating your rosters is ensuring that your game is connected to EA’s online servers. Madden 26 relies on these servers to provide official updates. On console or PC, check your network connection and make sure you are logged into your EA account. Without an online connection, you will not be able to download the latest roster files or receive mid-season updates. Once you are connected, the game will automatically check for roster updates when you start it.

    Being online also allows you to access other features, such as downloading community-created rosters and participating in online modes with accurate teams. For players who prefer not to rely on automatic updates, staying connected ensures you can manually download the latest official files whenever needed.

    Accessing Roster Management

    Once connected online, updating your rosters is straightforward. From the main menu, navigate to the Settings option, then select Roster Management. In this menu, you will find options to Download Roster Updates or Check for Updates. When you select this option, Madden 26 will display available roster updates, including both official and community-created files if you have opted to use them.

    Downloading the latest roster updates is as simple as selecting Download. Depending on the size of the update, the download may take a few minutes. Once the roster file has downloaded, the game will prompt you to apply the update. Confirming this step replaces your existing roster data with the newest version.

    Applying Updates to Existing Rosters

    After downloading the update, it is important to apply it correctly. In Madden 26, applying a roster update will affect all game modes that rely on current rosters, including Franchise Mode, Play Now, and online matches. The game may ask whether you want to overwrite existing rosters, which is recommended to ensure consistency across all modes.

    For Franchise Mode players, applying updated rosters can alter team lineups, player ratings, and injuries. This may slightly affect your existing team chemistry or player stats, especially if you update mid-season. Therefore, many players prefer to apply roster updates at the start of a franchise or during the offseason to avoid disrupting gameplay.

    Manual Roster Editing

    For players who want full control over their rosters, Madden 26 offers a manual editing option. This allows you to adjust player attributes, positions, contracts, and injuries. To do this, navigate to Roster Management, then select Edit Roster. From here, you can choose any team or player and make changes to better match real-life events or personal preferences.

    Manual editing is particularly useful if you want to simulate trades before they happen, correct inaccuracies in official rosters, or create custom player ratings. After editing, remember to save your changes to ensure they are applied across all game modes.

    Importing Community Rosters

    In addition to official updates, Madden 26 supports importing community-created roster files. These files are often maintained by dedicated fans and may include mid-season trades, rookies, or alternative ratings that are more reflective of current player performance.

    To import a roster file, download it from a trusted source and ensure it is compatible with Madden 26. On PC, place the file in the appropriate directory, usually under Documents > Madden 26 > Roster. On console, importing may require using your EA account or a USB drive, depending on platform restrictions. Once the file is in place, navigate to Roster Management > Load Roster, select the imported file, and confirm. Your game will now use the community-created roster, which may provide a more dynamic or accurate experience than official updates alone.

    Updating Rosters in Franchise Mode

    Franchise Mode is one of the modes most affected by roster changes. Even after starting a franchise, you can update your rosters to reflect real-world NFL events. To do this, open your franchise save and navigate to Options > Roster Updates, then select Apply Latest Rosters.

    It is important to note that mid-season updates can slightly change player statistics or team chemistry. While this adds realism, some players may prefer to wait until the offseason to avoid disrupting ongoing gameplay. However, regular updates during the season can also keep your franchise aligned with real-life NFL developments, making trades, scouting, and team management more accurate and engaging.

    Troubleshooting Roster Updates

    Sometimes roster updates may fail to download or apply correctly. Common issues include internet connectivity problems, corrupted files, or conflicts with custom rosters. To resolve these issues, ensure your EA account is online, delete any corrupted roster files, and re-download from a trusted source. If using custom rosters, official updates may not overwrite them automatically. In this case, manually loading official rosters is the best way to ensure consistency.

    Another common issue is downloading the wrong version of a roster. Always confirm that the roster file is specifically for Madden 26. Files from other Madden editions will not work and may cause errors.

    Keeping Rosters Updated Automatically

    For convenience, Madden 26 includes an automatic roster update feature. Enabling this option allows the game to download and apply roster updates as they are released, without requiring manual intervention. To activate this feature, navigate to Settings > Online Features > Automatic Updates, then enable Roster Updates.

    Automatic updates are particularly useful for casual players who want to ensure their game always reflects the latest NFL changes without having to manually check for updates. This keeps online play fair and ensures your Franchise Mode remains realistic throughout the season.

    Benefits Across Game Modes

    Updated rosters have a noticeable impact across all Madden 26 modes. In Franchise Mode, they improve drafting accuracy, scouting decisions, and trade negotiations. In Ultimate Team, they ensure your player cards reflect current NFL talent and performance. Online head-to-head matches become fairer and more engaging when both players are using the same up-to-date rosters. Even casual Play Now matches feel more authentic when teams are represented accurately.

    Staying Current With Mid-Season Changes

    The NFL is a fast-moving league, and Madden 26 reflects this with mid-season roster updates. Weekly updates may include adjustments to player ratings based on real-world performance, changes due to injuries, and trades completed in the NFL. Regularly downloading these updates ensures that your Madden 26 experience remains aligned with the latest NFL developments.

    Conclusion

    Updating rosters in Madden 26 is essential for a realistic and enjoyable football experience. Whether you rely on official EA roster updates, manually adjust players, or import custom rosters, keeping your teams current ensures accurate lineups, ratings, and gameplay. Regularly checking for updates, using best practices for manual edits, and understanding how different game modes handle rosters will enhance your Madden 26 experience. Staying on top of roster changes allows you to buy Madden 26 coins with the most accurate representation of the NFL, improving your strategy, team management, and overall satisfaction with the game.

    Buying Madden 26 coins on MMOexp.com is a great choice because the platform offers a safe and secure trading experience.


    Madden 26 Coins: Complete Roster Update Instructions In Madden 26 coins, having up-to-date rosters is essential for an authentic and competitive football experience. The NFL is constantly changing, with trades, free-agent signings, rookies entering the league, and player ratings fluctuating based on real-world performance. Playing with outdated rosters can make games feel unrealistic and reduce the challenge and enjoyment of the game. Whether you are playing Franchise Mode, Ultimate Team, or online head-to-head matches, keeping your rosters current ensures your gameplay reflects the real NFL season. This guide will walk you through everything you need to know to update rosters in Madden 26, including both official updates and community-created roster files. Why Updated Rosters Are Important Updated rosters in Madden 26 do more than just reflect current NFL lineups—they affect how you experience the game on multiple levels. In Franchise Mode, outdated rosters can throw off your drafting, trades, and team-building decisions. Playing online against others with outdated rosters can create unfair advantages or mismatches. Even in Ultimate Team, having accurate rosters ensures you are using the latest player cards and making strategic decisions based on current NFL talent. Simply put, updated rosters increase realism, fairness, and overall enjoyment. The Madden development team frequently releases official roster updates throughout the NFL season. These updates reflect trades, injuries, rating changes, and other real-life events. By keeping your rosters up-to-date, you ensure that your Madden 26 experience remains dynamic and accurate. Connecting to EA Servers The first step in updating your rosters is ensuring that your game is connected to EA’s online servers. Madden 26 relies on these servers to provide official updates. On console or PC, check your network connection and make sure you are logged into your EA account. Without an online connection, you will not be able to download the latest roster files or receive mid-season updates. Once you are connected, the game will automatically check for roster updates when you start it. Being online also allows you to access other features, such as downloading community-created rosters and participating in online modes with accurate teams. For players who prefer not to rely on automatic updates, staying connected ensures you can manually download the latest official files whenever needed. Accessing Roster Management Once connected online, updating your rosters is straightforward. From the main menu, navigate to the Settings option, then select Roster Management. In this menu, you will find options to Download Roster Updates or Check for Updates. When you select this option, Madden 26 will display available roster updates, including both official and community-created files if you have opted to use them. Downloading the latest roster updates is as simple as selecting Download. Depending on the size of the update, the download may take a few minutes. Once the roster file has downloaded, the game will prompt you to apply the update. Confirming this step replaces your existing roster data with the newest version. Applying Updates to Existing Rosters After downloading the update, it is important to apply it correctly. In Madden 26, applying a roster update will affect all game modes that rely on current rosters, including Franchise Mode, Play Now, and online matches. The game may ask whether you want to overwrite existing rosters, which is recommended to ensure consistency across all modes. For Franchise Mode players, applying updated rosters can alter team lineups, player ratings, and injuries. This may slightly affect your existing team chemistry or player stats, especially if you update mid-season. Therefore, many players prefer to apply roster updates at the start of a franchise or during the offseason to avoid disrupting gameplay. Manual Roster Editing For players who want full control over their rosters, Madden 26 offers a manual editing option. This allows you to adjust player attributes, positions, contracts, and injuries. To do this, navigate to Roster Management, then select Edit Roster. From here, you can choose any team or player and make changes to better match real-life events or personal preferences. Manual editing is particularly useful if you want to simulate trades before they happen, correct inaccuracies in official rosters, or create custom player ratings. After editing, remember to save your changes to ensure they are applied across all game modes. Importing Community Rosters In addition to official updates, Madden 26 supports importing community-created roster files. These files are often maintained by dedicated fans and may include mid-season trades, rookies, or alternative ratings that are more reflective of current player performance. To import a roster file, download it from a trusted source and ensure it is compatible with Madden 26. On PC, place the file in the appropriate directory, usually under Documents > Madden 26 > Roster. On console, importing may require using your EA account or a USB drive, depending on platform restrictions. Once the file is in place, navigate to Roster Management > Load Roster, select the imported file, and confirm. Your game will now use the community-created roster, which may provide a more dynamic or accurate experience than official updates alone. Updating Rosters in Franchise Mode Franchise Mode is one of the modes most affected by roster changes. Even after starting a franchise, you can update your rosters to reflect real-world NFL events. To do this, open your franchise save and navigate to Options > Roster Updates, then select Apply Latest Rosters. It is important to note that mid-season updates can slightly change player statistics or team chemistry. While this adds realism, some players may prefer to wait until the offseason to avoid disrupting ongoing gameplay. However, regular updates during the season can also keep your franchise aligned with real-life NFL developments, making trades, scouting, and team management more accurate and engaging. Troubleshooting Roster Updates Sometimes roster updates may fail to download or apply correctly. Common issues include internet connectivity problems, corrupted files, or conflicts with custom rosters. To resolve these issues, ensure your EA account is online, delete any corrupted roster files, and re-download from a trusted source. If using custom rosters, official updates may not overwrite them automatically. In this case, manually loading official rosters is the best way to ensure consistency. Another common issue is downloading the wrong version of a roster. Always confirm that the roster file is specifically for Madden 26. Files from other Madden editions will not work and may cause errors. Keeping Rosters Updated Automatically For convenience, Madden 26 includes an automatic roster update feature. Enabling this option allows the game to download and apply roster updates as they are released, without requiring manual intervention. To activate this feature, navigate to Settings > Online Features > Automatic Updates, then enable Roster Updates. Automatic updates are particularly useful for casual players who want to ensure their game always reflects the latest NFL changes without having to manually check for updates. This keeps online play fair and ensures your Franchise Mode remains realistic throughout the season. Benefits Across Game Modes Updated rosters have a noticeable impact across all Madden 26 modes. In Franchise Mode, they improve drafting accuracy, scouting decisions, and trade negotiations. In Ultimate Team, they ensure your player cards reflect current NFL talent and performance. Online head-to-head matches become fairer and more engaging when both players are using the same up-to-date rosters. Even casual Play Now matches feel more authentic when teams are represented accurately. Staying Current With Mid-Season Changes The NFL is a fast-moving league, and Madden 26 reflects this with mid-season roster updates. Weekly updates may include adjustments to player ratings based on real-world performance, changes due to injuries, and trades completed in the NFL. Regularly downloading these updates ensures that your Madden 26 experience remains aligned with the latest NFL developments. Conclusion Updating rosters in Madden 26 is essential for a realistic and enjoyable football experience. Whether you rely on official EA roster updates, manually adjust players, or import custom rosters, keeping your teams current ensures accurate lineups, ratings, and gameplay. Regularly checking for updates, using best practices for manual edits, and understanding how different game modes handle rosters will enhance your Madden 26 experience. Staying on top of roster changes allows you to buy Madden 26 coins with the most accurate representation of the NFL, improving your strategy, team management, and overall satisfaction with the game. Buying Madden 26 coins on MMOexp.com is a great choice because the platform offers a safe and secure trading experience.
    1
    ·1K Views ·0 Vista previa
  • Ashes of Creation Gold: Secrets to Gold Farming Success

    In Ashes of Creation, gold is a vital currency that drives a variety of in-game activities, from acquiring new gear and items to participating in the game’s economy through trading and crafting. As the game is designed to be a dynamic and player-driven world, understanding how to efficiently farm gold will ensure you can stay ahead and succeed in your adventures. Whether you're an adventurer, crafter, or trader, there are various ways to earn gold in Ashes of Creation. This article will explore some of the best methods to farm Ashes of Creation Gold in the game, helping you to optimize your gold-gaining strategies.

    1. Questing and PvE Content
    Main and Side Quests

    One of the primary methods to earn gold in Ashes of Creation is by engaging in quests. Both main storyline quests and side quests offer valuable rewards, including gold. Main quests are often tied to the overarching narrative and will naturally guide you through the world, providing consistent gold income as you progress. Side quests are more optional but can be highly profitable, offering substantial rewards and some surprises along the way.

    Many side quests in Ashes of Creation are designed to encourage exploration, combat, and interaction with NPCs. These quests often reward players with items, experience, and gold, especially if they are linked to important areas of the game or combat zones.

    PvE Encounters

    PvE (Player vs Environment) encounters, such as fighting mobs or clearing dungeons, are a steady source of gold. As you kill monsters or defeat dungeon bosses, they will drop gold and valuable items that can be sold for gold at vendors or through the player-driven market. Some areas will have higher-level monsters that drop more valuable loot, and killing them can yield greater gold rewards.

    Moreover, certain types of monsters drop resources that are used in crafting or crafting materials that are highly sought after. These resources, when sold, can provide a significant gold return. In this way, PvE content can serve as both an enjoyable and rewarding method to farm gold.

    2. Crafting and Gathering
    Gathering Resources

    The world of Ashes of Creation is rich with materials that can be harvested and gathered by players. These resources are critical for crafting and creating valuable items, and gathering them is an excellent method for earning gold. Some of the most common resources you can gather include ores, herbs, wood, and animal materials.

    Once gathered, you can either use these materials for crafting or sell them on the player market. Ashes of Creation is designed around a player-driven economy, and resource gathering is a fundamental part of it. Resources can be sold directly to other players who are looking for materials to craft their own items. This creates a sustainable gold farming strategy through constant demand for raw materials.

    Crafting Items for Profit

    Crafting in Ashes of Creation opens up another powerful way to farm gold. By combining gathered resources, you can create gear, potions, food, and other consumables that can be sold to other players or NPCs. Crafting is an intricate and rewarding system where items can vary in quality, making it possible to craft rare and high-quality items that fetch a good price.

    The game features different crafting professions, such as blacksmithing, alchemy, and tailoring. Specializing in one of these professions allows you to focus on creating valuable products that are in demand. For example, high-level armor, weapons, and accessories crafted through blacksmithing can sell for significant amounts of gold. Similarly, potions or consumable goods crafted through alchemy can be sold to other players for use in dungeons or PvP.

    Mastering crafting and offering highly sought-after items can turn you into a valuable commodity in the Ashes of Creation economy. Crafting goods for sale, particularly rare or high-tier items, can provide a consistent gold income, especially if you’re able to corner the market on a specific item.

    3. Trade and Player Markets
    Trading with NPCs and Other Players

    In Ashes of Creation, gold is not only earned by gathering or questing but also through strategic trading. Players have the ability to trade goods, materials, and crafted items with each other. The game offers a player-driven economy, meaning that prices fluctuate depending on supply and demand.

    Understanding the in-game market and trade dynamics will be key to your success in gold farming. Some regions may have higher demand for certain items, while others may not. You can capitalize on market trends and sell items that are in demand, thereby earning gold. For example, if a certain material is in high demand due to an upcoming patch or event, you can gather or craft that material and sell it for a premium price.

    Additionally, trading with NPCs will still provide a steady flow of gold, but trading with other players allows for more strategic and profitable transactions. Players can engage in direct trading, and some traders may focus on specific categories of items, such as resources, crafted gear, or consumables. If you know where to look and what items are in high demand, trading can become a profitable method of gold farming.

    The Marketboard and Auction House

    In Ashes of Creation, one of the most profitable ways to earn gold is through the Marketboard, a player-run auction house where goods are sold to the highest bidder. This feature allows players to list their items for sale, and others can bid on or buy them outright.

    It’s important to keep an eye on the market trends and to list your items at competitive prices. You can also use the marketboard to bid on items and then resell them for a higher price to make a profit. The market can fluctuate depending on the supply and demand of various goods, so having an eye on which items are trending can make you a lot of gold over time.

    4. PvP and Events
    Participating in PvP Activities

    PvP is another way to earn gold in Ashes of Creation, especially through large-scale sieges and open-world PvP encounters. Players can earn rewards through participating in events like the node wars, guild wars, and other PvP-focused activities. These events offer opportunities for gold rewards, especially if you are part of a winning faction or guild.

    Though the primary goal of PvP events is often domination and control of resources, the rewards for participating can be lucrative. Winning factions can gain gold from capturing valuable resources, controlling important areas, or looting defeated opponents. As PvP is often highly competitive, players should focus on developing their combat skills and strategy to increase their chances of success in these high-risk, high-reward activities.

    PvP Events and Tournaments

    In addition to node wars and sieges, Ashes of Creation features special events and tournaments, some of which offer substantial gold rewards. These events are typically limited-time and require skill and preparation to participate in. Winning these events can lead to rare items, gold, or other valuable rewards.

    Even if you don’t win the tournament, participating in PvP events often provides other valuable resources that can be sold or used to enhance your character. This makes PvP a viable method for earning gold, even if you’re not always victorious.

    5. World Bosses and Raids
    Defeating World Bosses

    World bosses are powerful enemies that roam the world of Ashes of Creation. These bosses are typically much stronger than regular enemies and require a group of players to defeat. When defeated, world bosses drop high-value loot, including rare items, crafting materials, and, of course, gold.

    The challenge of defeating world bosses can be intimidating, but with the right strategy and group coordination, you can claim a portion of the loot, including gold. It’s important to be part of a strong group of players when attempting these bosses, as they are often difficult to defeat solo.

    6. Special Tips for Gold Farming

    Maximize Your Gathering: Focus on gathering resources in high-demand areas, and be consistent with gathering when traveling or during downtime.

    Sell Rare Items: Keep an eye on the market for rare and high-demand items, and focus on crafting or gathering those specific materials.

    Optimize Crafting: If you choose crafting, master a profession that offers the highest return on investment and specialize in high-tier items.

    Focus on Efficiency: Streamline your activities by focusing on the gold-making methods that provide the most value for your time.

    Conclusion

    Gold farming in Ashes of Creation requires a combination of strategy, patience, and awareness of the in-game economy. Whether through questing, crafting, trading, PvE encounters, or PvP, players have a wide range of ways to earn gold. By diversifying your gold-farming methods, specializing in certain aspects of the game, and keeping a close eye on the market, you can build a steady gold income and thrive in the world of Ashes of Creation.

    As you continue your adventure, remember that the game is designed to be dynamic, with the economy constantly shifting based on player actions. Stay adaptable, experiment with different methods, and refine your strategies as you discover the most efficient ways to buy Ashes of Creation Gold in this vibrant world.

    MMOEXP The purchase of Ashes of Creation Gold was really fast, will definitely only use this website in the future. The live chat was also very helpful.
    Ashes of Creation Gold: Secrets to Gold Farming Success In Ashes of Creation, gold is a vital currency that drives a variety of in-game activities, from acquiring new gear and items to participating in the game’s economy through trading and crafting. As the game is designed to be a dynamic and player-driven world, understanding how to efficiently farm gold will ensure you can stay ahead and succeed in your adventures. Whether you're an adventurer, crafter, or trader, there are various ways to earn gold in Ashes of Creation. This article will explore some of the best methods to farm Ashes of Creation Gold in the game, helping you to optimize your gold-gaining strategies. 1. Questing and PvE Content Main and Side Quests One of the primary methods to earn gold in Ashes of Creation is by engaging in quests. Both main storyline quests and side quests offer valuable rewards, including gold. Main quests are often tied to the overarching narrative and will naturally guide you through the world, providing consistent gold income as you progress. Side quests are more optional but can be highly profitable, offering substantial rewards and some surprises along the way. Many side quests in Ashes of Creation are designed to encourage exploration, combat, and interaction with NPCs. These quests often reward players with items, experience, and gold, especially if they are linked to important areas of the game or combat zones. PvE Encounters PvE (Player vs Environment) encounters, such as fighting mobs or clearing dungeons, are a steady source of gold. As you kill monsters or defeat dungeon bosses, they will drop gold and valuable items that can be sold for gold at vendors or through the player-driven market. Some areas will have higher-level monsters that drop more valuable loot, and killing them can yield greater gold rewards. Moreover, certain types of monsters drop resources that are used in crafting or crafting materials that are highly sought after. These resources, when sold, can provide a significant gold return. In this way, PvE content can serve as both an enjoyable and rewarding method to farm gold. 2. Crafting and Gathering Gathering Resources The world of Ashes of Creation is rich with materials that can be harvested and gathered by players. These resources are critical for crafting and creating valuable items, and gathering them is an excellent method for earning gold. Some of the most common resources you can gather include ores, herbs, wood, and animal materials. Once gathered, you can either use these materials for crafting or sell them on the player market. Ashes of Creation is designed around a player-driven economy, and resource gathering is a fundamental part of it. Resources can be sold directly to other players who are looking for materials to craft their own items. This creates a sustainable gold farming strategy through constant demand for raw materials. Crafting Items for Profit Crafting in Ashes of Creation opens up another powerful way to farm gold. By combining gathered resources, you can create gear, potions, food, and other consumables that can be sold to other players or NPCs. Crafting is an intricate and rewarding system where items can vary in quality, making it possible to craft rare and high-quality items that fetch a good price. The game features different crafting professions, such as blacksmithing, alchemy, and tailoring. Specializing in one of these professions allows you to focus on creating valuable products that are in demand. For example, high-level armor, weapons, and accessories crafted through blacksmithing can sell for significant amounts of gold. Similarly, potions or consumable goods crafted through alchemy can be sold to other players for use in dungeons or PvP. Mastering crafting and offering highly sought-after items can turn you into a valuable commodity in the Ashes of Creation economy. Crafting goods for sale, particularly rare or high-tier items, can provide a consistent gold income, especially if you’re able to corner the market on a specific item. 3. Trade and Player Markets Trading with NPCs and Other Players In Ashes of Creation, gold is not only earned by gathering or questing but also through strategic trading. Players have the ability to trade goods, materials, and crafted items with each other. The game offers a player-driven economy, meaning that prices fluctuate depending on supply and demand. Understanding the in-game market and trade dynamics will be key to your success in gold farming. Some regions may have higher demand for certain items, while others may not. You can capitalize on market trends and sell items that are in demand, thereby earning gold. For example, if a certain material is in high demand due to an upcoming patch or event, you can gather or craft that material and sell it for a premium price. Additionally, trading with NPCs will still provide a steady flow of gold, but trading with other players allows for more strategic and profitable transactions. Players can engage in direct trading, and some traders may focus on specific categories of items, such as resources, crafted gear, or consumables. If you know where to look and what items are in high demand, trading can become a profitable method of gold farming. The Marketboard and Auction House In Ashes of Creation, one of the most profitable ways to earn gold is through the Marketboard, a player-run auction house where goods are sold to the highest bidder. This feature allows players to list their items for sale, and others can bid on or buy them outright. It’s important to keep an eye on the market trends and to list your items at competitive prices. You can also use the marketboard to bid on items and then resell them for a higher price to make a profit. The market can fluctuate depending on the supply and demand of various goods, so having an eye on which items are trending can make you a lot of gold over time. 4. PvP and Events Participating in PvP Activities PvP is another way to earn gold in Ashes of Creation, especially through large-scale sieges and open-world PvP encounters. Players can earn rewards through participating in events like the node wars, guild wars, and other PvP-focused activities. These events offer opportunities for gold rewards, especially if you are part of a winning faction or guild. Though the primary goal of PvP events is often domination and control of resources, the rewards for participating can be lucrative. Winning factions can gain gold from capturing valuable resources, controlling important areas, or looting defeated opponents. As PvP is often highly competitive, players should focus on developing their combat skills and strategy to increase their chances of success in these high-risk, high-reward activities. PvP Events and Tournaments In addition to node wars and sieges, Ashes of Creation features special events and tournaments, some of which offer substantial gold rewards. These events are typically limited-time and require skill and preparation to participate in. Winning these events can lead to rare items, gold, or other valuable rewards. Even if you don’t win the tournament, participating in PvP events often provides other valuable resources that can be sold or used to enhance your character. This makes PvP a viable method for earning gold, even if you’re not always victorious. 5. World Bosses and Raids Defeating World Bosses World bosses are powerful enemies that roam the world of Ashes of Creation. These bosses are typically much stronger than regular enemies and require a group of players to defeat. When defeated, world bosses drop high-value loot, including rare items, crafting materials, and, of course, gold. The challenge of defeating world bosses can be intimidating, but with the right strategy and group coordination, you can claim a portion of the loot, including gold. It’s important to be part of a strong group of players when attempting these bosses, as they are often difficult to defeat solo. 6. Special Tips for Gold Farming Maximize Your Gathering: Focus on gathering resources in high-demand areas, and be consistent with gathering when traveling or during downtime. Sell Rare Items: Keep an eye on the market for rare and high-demand items, and focus on crafting or gathering those specific materials. Optimize Crafting: If you choose crafting, master a profession that offers the highest return on investment and specialize in high-tier items. Focus on Efficiency: Streamline your activities by focusing on the gold-making methods that provide the most value for your time. Conclusion Gold farming in Ashes of Creation requires a combination of strategy, patience, and awareness of the in-game economy. Whether through questing, crafting, trading, PvE encounters, or PvP, players have a wide range of ways to earn gold. By diversifying your gold-farming methods, specializing in certain aspects of the game, and keeping a close eye on the market, you can build a steady gold income and thrive in the world of Ashes of Creation. As you continue your adventure, remember that the game is designed to be dynamic, with the economy constantly shifting based on player actions. Stay adaptable, experiment with different methods, and refine your strategies as you discover the most efficient ways to buy Ashes of Creation Gold in this vibrant world. MMOEXP The purchase of Ashes of Creation Gold was really fast, will definitely only use this website in the future. The live chat was also very helpful.
    ·2K Views ·0 Vista previa
Resultados de la búsqueda
Babafig https://www.babafig.com