Buy Verified Cash App Account – Complete Guide for Gaming & Online Businesses |
Email: contact.smmproit@gmail.com
Telegram: @smmproit
Whatsapp:+1(812)528-8960
https://smmproit.com/product/buy-verified-cash-app-accounts/
Cash App has become one of the most popular platforms for financial transactions, especially for gaming businesses, creators, and online services. If you’re running a game host business, managing live streaming payments, or handling money from premium services, a verified Cash App account is no longer optional—it’s essential.
In this guide, we’ll break everything down in simple words. No confusing tech talk. Just real answers, real tips, and real value. Ready? Let’s dive in.
| ### Why Should You Buy Verified Cash App Accounts for Your Gaming Business? |
Gaming businesses deal with fast money movement, live stream payments, and tagging publish systems. A verified Cash App account gives you smoother access to payments without interruptions.
Think of it like upgrading from a bicycle to a sports bike. Same road—faster ride.
| #### How Cash App Supports Gaming Payments |
Cash App allows:
Instant transactions
Easy bank account linking
Support for live stream tips & subscriptions stats use listener insights
Fast payouts for game host services
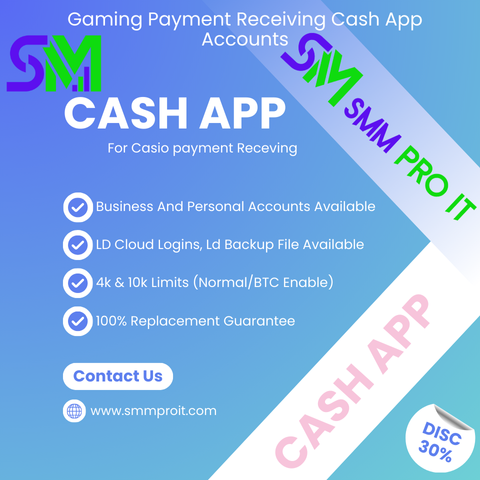
Verified accounts unlock higher transaction limits, which is critical when money flows nonstop.
| #### Problems With Unverified Accounts |
Unverified accounts come with limits:
Low sending and receiving caps
Account freezes
Missing additional features
That’s why many businesses avoid unverified accounts completely.
| ### The Positive Side of Buy Verified Cash App Accounts |
Buying a verified Cash App account saves time. No waiting. No ID stress. Just instant access.
| #### Higher Transaction Limits and Trust |
Verified accounts allow larger transfers, smoother money flow, and better trust from users. When customers see a verified profile, they feel safe sending money.
Email: contact.smmproit@gmail.com
Telegram: @smmproit
Whatsapp:+1(812)528-8960
https://smmproit.com/product/buy-verified-cash-app-accounts/
| ##### Why Verification Matters |
Verification confirms:
Phone number
Government-issued ID
Real profile posts
This builds trust and unlocks premium services.
| ### How to Unlock Cash App Borrow? |
Cash App Borrow lets users borrow small amounts of money directly from Cash App.
| #### Requirements for Borrow Feature |
You need:
A verified account
Regular transactions
A linked bank account
Most verified Cash App accounts already meet these requirements.
| ### Benefits of Owning Buy Verified Cash App Accounts for Gaming Business |
For gaming and creator businesses, the benefits are massive.
| #### Fast Payments and Financial Transactions |
You get:
Instant payments
No delays during live streaming
Uninterrupted listening upfront tracklists for music events
Time saved = money earned.
| #### Multiple Profiles and Creator Tools |
Verified users can manage:
Multiple profiles
Creators upload content
Start creator tools creator tools
Unlimited uploads share infinite
Perfect for game hosts and streamers.
| ### How to Buy Verified Cash App Accounts from smmproit |
Buying from smmproit is simple and beginner-friendly.
| #### Step-by-Step Buying Process |
Visit smmproit
Choose verified account type
Get account upload details
Free login credentials provided
Access granted within time
Support includes 24 hours reply contact via telegram.
| ### Why Do People Trust smmproit |
Trust matters when money is involved.
| #### 24 Hours Reply Contact and Secure Access |
smmproit offers:
Free join login
Secure access
Fast delivery
Trusted services
That’s why users stick with them.
| ### When Buy Verified Cash App Accounts? |
Buy when:
Your business is growing
You need higher limits
You want BTC access
You want fewer takedowns
Simple timing. Smart move.
| ### Buy Verified Cash App Account – Keyword Insights |
People search:
“Buy verified cash app accounts”
“Buy a verified cash app account”
“Buy cash app verified account”
“Buy verified cash app account reddit”
Why? Because verified equals power.
| ### Benefits of a Verified Cash App Account |
Top benefits include:
Higher transaction limits
Bitcoin support
Premium services
More trust
It’s an upgrade—upgrade upgrade upgrade pro.
| ### How to Buy a Verified Cash App Account Safely |
Always choose:
Trusted providers
Verified reviews
Clear policies
Avoid free verified cash app account scams.
| ### Buy BTC Enabled Cash App Account |
BTC-enabled accounts allow:
Bitcoin trading
Secure crypto transactions
Extra income streams
Verified accounts unlock this feature easily.
| ### What is the Limit of a Verified Cash App? |
Verified users can send and receive thousands weekly. Limits depend on usage and region but are far higher than unverified accounts.
| ### How Does Cash App Work? |
Cash App lets users:
Send money
Receive payments
Link bank accounts
Enable Bitcoin
Manage adverts enjoy promotions
Simple. Fast. Reliable.
| ### Is It Safe to Enable Bitcoin on the Cash Application? |
Yes, if your account is verified. Security layers protect transactions and funds.
| ### Can I Have 2 Verified Cash App Accounts? |
Yes, but each must use:
Different phone number
Separate bank account
Unique identity
| ### How to Verify Cash App on Android |
Steps include:
Install app
Enter phone number
Submit government-issued ID
Wait for approval
Or skip delays by buying verified accounts.
| ### Free Verified Cash App Account – Is It Real? |
Usually no. Most “free upload” or “free login” offers are scams. Always verify sources.
| ### How to Create a Verified Cash App Account |
You need:
Real ID
Phone number
Bank account
That’s why many prefer buying instead.
| ### Where’s The Best Place To Buy A Verified Cash App Account? |
Based on Reviews Fund business feedback and user experience, smmproit stands out as a reliable provider. Alongside Reviews Fund insights, smmproit delivers secure, verified Cash App accounts with fast access, strong trust, and responsive support. Their services focus on real verified accounts, not risky shortcuts.
| ### Conclusion |
If you’re serious about gaming, streaming, or online money services, buying a verified Cash App account is a smart move. It saves time, boosts trust, and unlocks premium features. Providers like smmproit make the process smooth, secure, and beginner-friendly. Upgrade your business—and your peace of mind.
| ### FAQs |
1. Is buying a verified Cash App account legal?
It depends on usage. Always follow platform rules.
2. Can verified accounts get banned?
Only if misused. Proper use keeps them safe.
3. Do verified accounts support BTC?
Yes, most do.
4. Is smmproit trustworthy?
Yes, many users trust their services.
5. Are free verified Cash App accounts safe?
Mostly no. Paid trusted sources are safer.
Email: contact.smmproit@gmail.com
Telegram: @smmproit
Whatsapp:+1(812)528-8960
https://smmproit.com/product/buy-verified-cash-app-accounts/
Buy Verified Cash App Account – Complete Guide for Gaming & Online Businesses |
Email: contact.smmproit@gmail.com
Telegram: @smmproit
Whatsapp:+1(812)528-8960
https://smmproit.com/product/buy-verified-cash-app-accounts/
Cash App has become one of the most popular platforms for financial transactions, especially for gaming businesses, creators, and online services. If you’re running a game host business, managing live streaming payments, or handling money from premium services, a verified Cash App account is no longer optional—it’s essential.
In this guide, we’ll break everything down in simple words. No confusing tech talk. Just real answers, real tips, and real value. Ready? Let’s dive in. 🎮💸
| ### Why Should You Buy Verified Cash App Accounts for Your Gaming Business? |
Gaming businesses deal with fast money movement, live stream payments, and tagging publish systems. A verified Cash App account gives you smoother access to payments without interruptions.
Think of it like upgrading from a bicycle to a sports bike. Same road—faster ride.
| #### How Cash App Supports Gaming Payments |
Cash App allows:
Instant transactions
Easy bank account linking
Support for live stream tips & subscriptions stats use listener insights
Fast payouts for game host services
Verified accounts unlock higher transaction limits, which is critical when money flows nonstop.
| #### Problems With Unverified Accounts |
Unverified accounts come with limits:
Low sending and receiving caps
Account freezes
Missing additional features
That’s why many businesses avoid unverified accounts completely.
| ### The Positive Side of Buy Verified Cash App Accounts |
Buying a verified Cash App account saves time. No waiting. No ID stress. Just instant access.
| #### Higher Transaction Limits and Trust |
Verified accounts allow larger transfers, smoother money flow, and better trust from users. When customers see a verified profile, they feel safe sending money.
Email: contact.smmproit@gmail.com
Telegram: @smmproit
Whatsapp:+1(812)528-8960
https://smmproit.com/product/buy-verified-cash-app-accounts/
| ##### Why Verification Matters |
Verification confirms:
Phone number
Government-issued ID
Real profile posts
This builds trust and unlocks premium services.
| ### How to Unlock Cash App Borrow? |
Cash App Borrow lets users borrow small amounts of money directly from Cash App.
| #### Requirements for Borrow Feature |
You need:
A verified account
Regular transactions
A linked bank account
Most verified Cash App accounts already meet these requirements.
| ### Benefits of Owning Buy Verified Cash App Accounts for Gaming Business |
For gaming and creator businesses, the benefits are massive.
| #### Fast Payments and Financial Transactions |
You get:
Instant payments
No delays during live streaming
Uninterrupted listening upfront tracklists for music events
Time saved = money earned.
| #### Multiple Profiles and Creator Tools |
Verified users can manage:
Multiple profiles
Creators upload content
Start creator tools creator tools
Unlimited uploads share infinite
Perfect for game hosts and streamers.
| ### How to Buy Verified Cash App Accounts from smmproit |
Buying from smmproit is simple and beginner-friendly.
| #### Step-by-Step Buying Process |
Visit smmproit
Choose verified account type
Get account upload details
Free login credentials provided
Access granted within time
Support includes 24 hours reply contact via telegram.
| ### Why Do People Trust smmproit |
Trust matters when money is involved.
| #### 24 Hours Reply Contact and Secure Access |
smmproit offers:
Free join login
Secure access
Fast delivery
Trusted services
That’s why users stick with them.
| ### When Buy Verified Cash App Accounts? |
Buy when:
Your business is growing
You need higher limits
You want BTC access
You want fewer takedowns
Simple timing. Smart move.
| ### Buy Verified Cash App Account – Keyword Insights |
People search:
“Buy verified cash app accounts”
“Buy a verified cash app account”
“Buy cash app verified account”
“Buy verified cash app account reddit”
Why? Because verified equals power.
| ### Benefits of a Verified Cash App Account |
Top benefits include:
Higher transaction limits
Bitcoin support
Premium services
More trust
It’s an upgrade—upgrade upgrade upgrade pro.
| ### How to Buy a Verified Cash App Account Safely |
Always choose:
Trusted providers
Verified reviews
Clear policies
Avoid free verified cash app account scams.
| ### Buy BTC Enabled Cash App Account |
BTC-enabled accounts allow:
Bitcoin trading
Secure crypto transactions
Extra income streams
Verified accounts unlock this feature easily.
| ### What is the Limit of a Verified Cash App? |
Verified users can send and receive thousands weekly. Limits depend on usage and region but are far higher than unverified accounts.
| ### How Does Cash App Work? |
Cash App lets users:
Send money
Receive payments
Link bank accounts
Enable Bitcoin
Manage adverts enjoy promotions
Simple. Fast. Reliable.
| ### Is It Safe to Enable Bitcoin on the Cash Application? |
Yes, if your account is verified. Security layers protect transactions and funds.
| ### Can I Have 2 Verified Cash App Accounts? |
Yes, but each must use:
Different phone number
Separate bank account
Unique identity
| ### How to Verify Cash App on Android |
Steps include:
Install app
Enter phone number
Submit government-issued ID
Wait for approval
Or skip delays by buying verified accounts.
| ### Free Verified Cash App Account – Is It Real? |
Usually no. Most “free upload” or “free login” offers are scams. Always verify sources.
| ### How to Create a Verified Cash App Account |
You need:
Real ID
Phone number
Bank account
That’s why many prefer buying instead.
| ### Where’s The Best Place To Buy A Verified Cash App Account? |
Based on Reviews Fund business feedback and user experience, smmproit stands out as a reliable provider. Alongside Reviews Fund insights, smmproit delivers secure, verified Cash App accounts with fast access, strong trust, and responsive support. Their services focus on real verified accounts, not risky shortcuts.
| ### Conclusion |
If you’re serious about gaming, streaming, or online money services, buying a verified Cash App account is a smart move. It saves time, boosts trust, and unlocks premium features. Providers like smmproit make the process smooth, secure, and beginner-friendly. Upgrade your business—and your peace of mind.
| ### FAQs |
1. Is buying a verified Cash App account legal?
It depends on usage. Always follow platform rules.
2. Can verified accounts get banned?
Only if misused. Proper use keeps them safe.
3. Do verified accounts support BTC?
Yes, most do.
4. Is smmproit trustworthy?
Yes, many users trust their services.
5. Are free verified Cash App accounts safe?
Mostly no. Paid trusted sources are safer.
Email: contact.smmproit@gmail.com
Telegram: @smmproit
Whatsapp:+1(812)528-8960
https://smmproit.com/product/buy-verified-cash-app-accounts/