Ashes of Creation Gold: Beginner Tips to Level Smarter
Ashes of Creation Gold is an ambitious MMORPG that seeks to redefine the genre with a player-driven world, dynamic node systems, and a deep economic and crafting infrastructure. The game is set in the richly detailed land of Verra, where every decision a player makes can influence the development of cities, the flow of commerce, and even the balance of power between factions. For new players, this can feel both exciting and overwhelming. Understanding the core mechanics, prioritizing your progression, and engaging with the community are crucial to making the most of your experience. This guide provides essential tips to help new adventurers start strong in Ashes of Creation.
1. Embrace the Player-Driven World
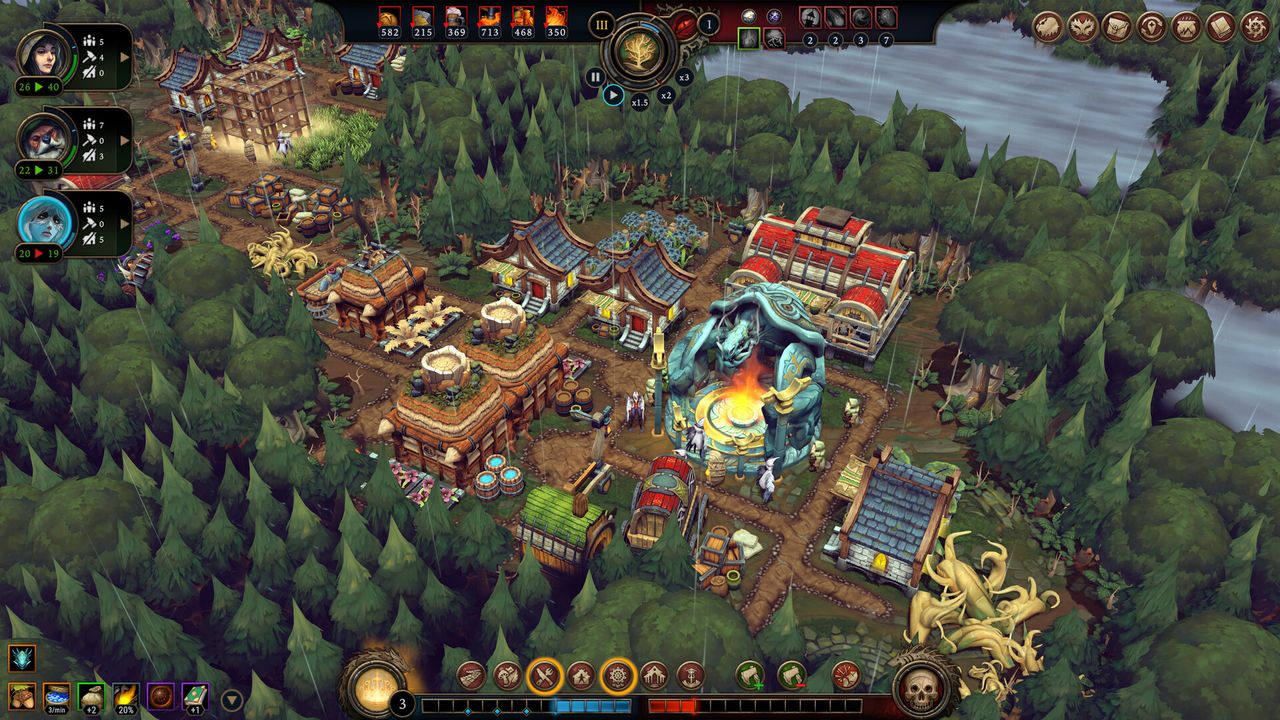
Unlike traditional MMOs that funnel players through linear questing, Ashes of Creation emphasizes player agency. The world evolves based on player actions: nodes grow into towns and cities, roads and infrastructure are built, and economies emerge organically. Understanding this is essential for newcomers. Your contributions to quests, resource gathering, crafting, and combat affect the development of nodes and, by extension, the entire game world.
Being mindful of your impact on the ecosystem—through your actions, reputation, and alliances—will help you navigate the game more effectively. Early participation in node development can provide long-term advantages such as access to unique vendors, crafting stations, and special quests.
2. Choose Your Starting Region Carefully
When creating your character, your choice of server and starting zone can influence your early experience. Latency is crucial; pick a server that provides a stable connection. Playing on a server where friends are present enhances opportunities for group activities, resource sharing, and protection during PvP encounters.
Each starting region has its own flavor. Some areas provide structured quests with clear objectives, while others encourage exploration and self-directed discovery. Choosing a starting region that aligns with your playstyle—whether you prefer a guided experience or an open-world adventure—can help ease the learning curve.
3. Complete Early Quests Thoroughly
The initial quests in Ashes of Creation are not just a means to gain experience; they are designed to introduce core game systems. Early missions teach players about combat mechanics, gathering, crafting, navigation, and inventory management. Completing these quests thoroughly ensures that you acquire basic equipment, resources, and knowledge essential for survival and growth.
Focusing on early quest lines before abandoning them for grind-heavy activities is important. These quests often provide tools, weapons, and mounts that make subsequent gameplay smoother. Additionally, early questing familiarizes you with the local geography and important NPCs, which will be helpful in both solo and group content.
4. Invest Time in Understanding Combat and Skills
Combat in Ashes of Creation is action-oriented and strategic. Players equip two weapons simultaneously, each with its own skill progression. Experimenting with different weapon types early allows you to find a combination that suits your playstyle.
Skill points are earned regularly as you level, and spending them wisely is critical. Prioritize skills that enhance survivability, mobility, and utility, in addition to damage output. Avoid hoarding points for later levels, as using them immediately can improve your effectiveness in early-game combat and group encounters.
5. Utilize Mounts Effectively
Mounts are an essential part of traversing the expansive world of Verra. Without a mount, traveling long distances is slow and exposes you to dangers, including PvP attacks and environmental hazards. Acquire your first mount as soon as possible and consider maintaining multiple mounts for backup.
Different mounts serve different purposes. While land mounts are sufficient for most areas, water mounts or specialized mounts may be required for certain terrains. Treat mounts as valuable resources—they are not easily replaceable and can be crucial for survival in both solo and group scenarios.
6. Approach Gear and Equipment Strategically
Early gear in Ashes of Creation is obtained through a combination of quests, dungeon runs, and crafting. Pocket dungeons and small group activities can drop useful equipment, but crafting is often a more reliable way to obtain gear suited to your class.
Prioritize crafting early by learning basic professions and gathering materials from your surroundings. Crafting your own weapons and armor allows you to control your progression and ensures your equipment matches your playstyle. Always monitor durability, as neglected gear can slow progression and leave you vulnerable in combat.
7. Learn the Gathering, Processing, and Crafting Cycle
Professions are not optional side activities; they are integral to your success in Ashes of Creation. Gathering raw materials from nodes, processing them into usable resources, and crafting equipment or consumables form a continuous loop that drives both personal progression and the game’s economy.
Select at least one gathering profession and a corresponding processing skill early. Whether it is lumber milling, metalworking, tailoring, or cooking, mastering these skills ensures you can create essential items and potentially profit by selling resources to other players. Skilled crafters often find themselves in demand within their community, making these skills an indirect path to influence and survival.
8. Manage Inventory and Currency Wisely
Inventory management is critical in Ashes of Creation. Resources, loot, and crafting materials can accumulate quickly, so plan your carrying capacity and storage solutions carefully. Make use of storage chests within nodes to safeguard valuable items.
Currency, including gold and Glint, is earned through combat, gathering, and quests. Avoid spending all currency impulsively; some of it may be needed later for crafting, caravan supplies, or node contributions. Efficient financial management allows you to maximize your benefits from the game’s economy and participate more fully in group activities.
9. Engage in Node Commissions Daily
Every node features commission boards offering a variety of tasks—adventuring, hunting, or artisan work. These commissions provide rewards such as experience, currency, and materials while directly contributing to node development.
Regular participation in commissions not only advances your character but also helps your community grow. Nodes with active player engagement evolve faster, unlocking additional services and infrastructure. By completing commissions consistently, you enhance both your personal progression and the collective capabilities of your faction.
10. Join a Guild Early
Guilds are more than social groups; they are critical to survival and advancement. Being part of a guild provides access to coordinated activities such as caravan runs, group dungeons, PvP engagements, and resource sharing. Guilds also offer strategic advantages, including collective knowledge of the world, shared crafting resources, and guild-specific perks.
Early membership in a guild helps you navigate the challenges of the world, gain allies, and participate in large-scale events that solo players may find difficult to tackle.
Conclusion
Starting out in Ashes of Creation can be a daunting experience due to its complexity and player-driven mechanics. However, by understanding the game’s systems, approaching combat and crafting strategically, participating in node development, and engaging with the community, new players can quickly establish a strong foundation.
Key habits such as effective inventory and currency management, daily participation in commissions, mastering gathering and crafting, and joining a guild early will enhance your journey. The world of Verra is dynamic and responsive, rewarding thoughtful and engaged play. By following these essential tips, new players can navigate the challenges, enjoy meaningful progression, and contribute to a vibrant and buy AoC Gold.
MMOEXP The purchase of Ashes of Creation Gold was really fast, will definitely only use this website in the future. The live chat was also very helpful.
Ashes of Creation Gold: Beginner Tips to Level Smarter
Ashes of Creation Gold is an ambitious MMORPG that seeks to redefine the genre with a player-driven world, dynamic node systems, and a deep economic and crafting infrastructure. The game is set in the richly detailed land of Verra, where every decision a player makes can influence the development of cities, the flow of commerce, and even the balance of power between factions. For new players, this can feel both exciting and overwhelming. Understanding the core mechanics, prioritizing your progression, and engaging with the community are crucial to making the most of your experience. This guide provides essential tips to help new adventurers start strong in Ashes of Creation.
1. Embrace the Player-Driven World
Unlike traditional MMOs that funnel players through linear questing, Ashes of Creation emphasizes player agency. The world evolves based on player actions: nodes grow into towns and cities, roads and infrastructure are built, and economies emerge organically. Understanding this is essential for newcomers. Your contributions to quests, resource gathering, crafting, and combat affect the development of nodes and, by extension, the entire game world.
Being mindful of your impact on the ecosystem—through your actions, reputation, and alliances—will help you navigate the game more effectively. Early participation in node development can provide long-term advantages such as access to unique vendors, crafting stations, and special quests.
2. Choose Your Starting Region Carefully
When creating your character, your choice of server and starting zone can influence your early experience. Latency is crucial; pick a server that provides a stable connection. Playing on a server where friends are present enhances opportunities for group activities, resource sharing, and protection during PvP encounters.
Each starting region has its own flavor. Some areas provide structured quests with clear objectives, while others encourage exploration and self-directed discovery. Choosing a starting region that aligns with your playstyle—whether you prefer a guided experience or an open-world adventure—can help ease the learning curve.
3. Complete Early Quests Thoroughly
The initial quests in Ashes of Creation are not just a means to gain experience; they are designed to introduce core game systems. Early missions teach players about combat mechanics, gathering, crafting, navigation, and inventory management. Completing these quests thoroughly ensures that you acquire basic equipment, resources, and knowledge essential for survival and growth.
Focusing on early quest lines before abandoning them for grind-heavy activities is important. These quests often provide tools, weapons, and mounts that make subsequent gameplay smoother. Additionally, early questing familiarizes you with the local geography and important NPCs, which will be helpful in both solo and group content.
4. Invest Time in Understanding Combat and Skills
Combat in Ashes of Creation is action-oriented and strategic. Players equip two weapons simultaneously, each with its own skill progression. Experimenting with different weapon types early allows you to find a combination that suits your playstyle.
Skill points are earned regularly as you level, and spending them wisely is critical. Prioritize skills that enhance survivability, mobility, and utility, in addition to damage output. Avoid hoarding points for later levels, as using them immediately can improve your effectiveness in early-game combat and group encounters.
5. Utilize Mounts Effectively
Mounts are an essential part of traversing the expansive world of Verra. Without a mount, traveling long distances is slow and exposes you to dangers, including PvP attacks and environmental hazards. Acquire your first mount as soon as possible and consider maintaining multiple mounts for backup.
Different mounts serve different purposes. While land mounts are sufficient for most areas, water mounts or specialized mounts may be required for certain terrains. Treat mounts as valuable resources—they are not easily replaceable and can be crucial for survival in both solo and group scenarios.
6. Approach Gear and Equipment Strategically
Early gear in Ashes of Creation is obtained through a combination of quests, dungeon runs, and crafting. Pocket dungeons and small group activities can drop useful equipment, but crafting is often a more reliable way to obtain gear suited to your class.
Prioritize crafting early by learning basic professions and gathering materials from your surroundings. Crafting your own weapons and armor allows you to control your progression and ensures your equipment matches your playstyle. Always monitor durability, as neglected gear can slow progression and leave you vulnerable in combat.
7. Learn the Gathering, Processing, and Crafting Cycle
Professions are not optional side activities; they are integral to your success in Ashes of Creation. Gathering raw materials from nodes, processing them into usable resources, and crafting equipment or consumables form a continuous loop that drives both personal progression and the game’s economy.
Select at least one gathering profession and a corresponding processing skill early. Whether it is lumber milling, metalworking, tailoring, or cooking, mastering these skills ensures you can create essential items and potentially profit by selling resources to other players. Skilled crafters often find themselves in demand within their community, making these skills an indirect path to influence and survival.
8. Manage Inventory and Currency Wisely
Inventory management is critical in Ashes of Creation. Resources, loot, and crafting materials can accumulate quickly, so plan your carrying capacity and storage solutions carefully. Make use of storage chests within nodes to safeguard valuable items.
Currency, including gold and Glint, is earned through combat, gathering, and quests. Avoid spending all currency impulsively; some of it may be needed later for crafting, caravan supplies, or node contributions. Efficient financial management allows you to maximize your benefits from the game’s economy and participate more fully in group activities.
9. Engage in Node Commissions Daily
Every node features commission boards offering a variety of tasks—adventuring, hunting, or artisan work. These commissions provide rewards such as experience, currency, and materials while directly contributing to node development.
Regular participation in commissions not only advances your character but also helps your community grow. Nodes with active player engagement evolve faster, unlocking additional services and infrastructure. By completing commissions consistently, you enhance both your personal progression and the collective capabilities of your faction.
10. Join a Guild Early
Guilds are more than social groups; they are critical to survival and advancement. Being part of a guild provides access to coordinated activities such as caravan runs, group dungeons, PvP engagements, and resource sharing. Guilds also offer strategic advantages, including collective knowledge of the world, shared crafting resources, and guild-specific perks.
Early membership in a guild helps you navigate the challenges of the world, gain allies, and participate in large-scale events that solo players may find difficult to tackle.
Conclusion
Starting out in Ashes of Creation can be a daunting experience due to its complexity and player-driven mechanics. However, by understanding the game’s systems, approaching combat and crafting strategically, participating in node development, and engaging with the community, new players can quickly establish a strong foundation.
Key habits such as effective inventory and currency management, daily participation in commissions, mastering gathering and crafting, and joining a guild early will enhance your journey. The world of Verra is dynamic and responsive, rewarding thoughtful and engaged play. By following these essential tips, new players can navigate the challenges, enjoy meaningful progression, and contribute to a vibrant and buy AoC Gold.
MMOEXP The purchase of Ashes of Creation Gold was really fast, will definitely only use this website in the future. The live chat was also very helpful.